
 Pin it
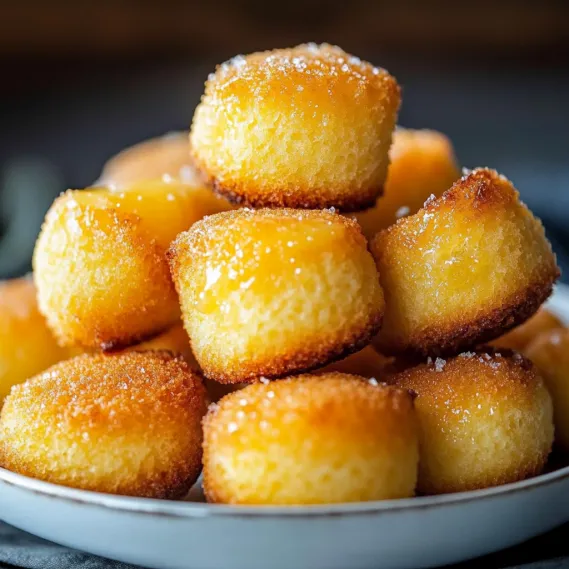
Bite-sized and buttery, these mini cornbread treats come with a warm honey butter coating that makes them absolutely addictive. Each golden popper balances sweet and savory perfectly, featuring crispy edges that give way to soft, moist centers. The magic happens when you brush that honey butter mix onto the warm bites, creating a shiny finish that sweetens while highlighting the natural cornmeal taste. Serve them with your favorite chili, put them out as party snacks, or enjoy them as a treat - everyone will keep reaching for more until they're all gone.
I stumbled on these little gems completely by accident when I couldn't find my regular muffin pan before a family party. Using my mini muffin tray instead created these irresistible bites that got snatched up immediately. They've now become what everyone asks me to bring to gatherings. At our last family Thanksgiving, I caught my cousin sneaking some into her napkin to take home because they disappeared so fast!
Key Ingredients and Smart Selection Advice
- Yellow Cornmeal: Go for medium-ground for the best texture. Fine-ground gets mushy, while coarse makes them too gritty. Look for stone-ground types for the richest taste.
- Buttermilk: Its acid content makes these incredibly soft and adds a slight tang that works against the sweetness. Using fresh buttermilk really does make them taste noticeably better.
- Honey: Try getting local honey for your glaze if you can. Different kinds like wildflower or clover each bring their own special taste to the mix.
- Unsalted Butter: Grab good quality butter for the glaze since you'll really taste it. Fancy European-style ones with extra fat make them feel extra luxurious.
What goes into these little bites really matters. The first batch I made with fancy stone-ground cornmeal and honey from a local farm tasted way better than my test batch. You could really taste the earthy notes from good cornmeal playing off the flowery sweetness in quality honey. Such basic ingredients, but they came together into something truly amazing.
Step-by-Step Cooking Guide
- Step 1: Get Everything Ready
- Start by turning your oven on to 400°F (200°C). Let it heat up completely before baking. Spray or butter your 24-cup mini muffin pan really well, getting into all the corners so nothing sticks. You can also use those flexible silicone molds on top of a baking sheet if you have them. Measure out everything before you start mixing to make the whole process smoother.
- Step 2: Mix It Up Right
- In a big bowl, stir together your cornmeal, flour, sugar, baking powder and salt until they're all mixed up. This spreads out the rising agents so everything puffs up evenly. In another bowl, mix your buttermilk, melted butter, and egg until they're smooth. Pour your wet stuff into your dry stuff and fold it all together with gentle movements until just barely mixed. Don't worry about small lumps - they're fine! Too much mixing will make your poppers tough.
- Step 3: Fill Them Properly
- Use a small cookie scoop or spoon to fill each cup about 3/4 full. This gives them space to rise without spilling over. For super neat filling, try using a piping bag or just a plastic bag with a corner cut off. Tap the filled pan on your counter a few times to get rid of air bubbles and help the batter settle. If some cups have more than others, use a spoon to even things out so they all cook the same.
- Step 4: Bake Until Golden
- Put your pan in the hot oven and bake for 10-12 minutes. Turn the pan around halfway through so they brown evenly. Keep an eye on them toward the end - they should be light gold around the edges and bounce back when you touch them lightly. Stick a toothpick in the middle to check - it should come out mostly clean. Don't leave them in too long or these little guys will dry out fast.
- Step 5: Add The Glaze While Hot
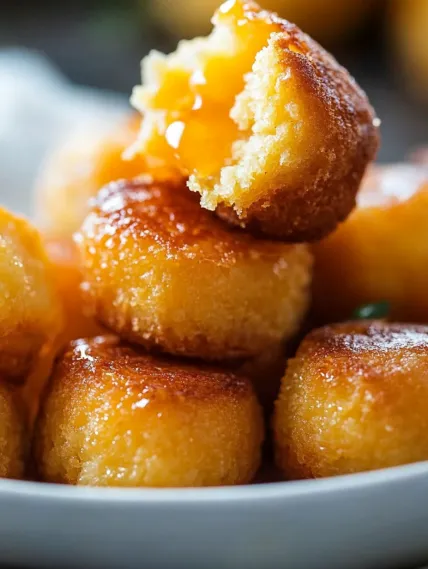
- While they're baking, make your glaze by mixing melted butter and honey until smooth. Keep it warm. Once the poppers come out, let them sit in the pan for just 2-3 minutes, then brush each one with plenty of the warm honey butter. The warm poppers will soak some up, making them super moist and flavorful. Right before you serve them, brush on a second light coat for extra sweetness and shine.
 Pin it
My first batch taught me something important about the glaze. I was in a hurry and only put on one layer, which meant I missed out on the full honey butter experience. Now I always do it twice - once right after baking to get that moisture and flavor inside, and again just before serving to get that pretty shine on top.
Clever Prep-Ahead Strategies
You can easily make these ahead of time. Mix all the dry stuff and keep it in a sealed container for up to a week. The wet ingredients can be mixed and kept in the fridge for a day. When you're ready to bake, just combine them with a quick stir before filling the pan. Or you can bake the poppers up to two days early (without the glaze) and store them in a sealed container on your counter. When you want to serve them, warm them in a 350°F oven for 5-7 minutes, then brush on fresh glaze right before putting them out.
 Pin it
Tasty Variation Ideas
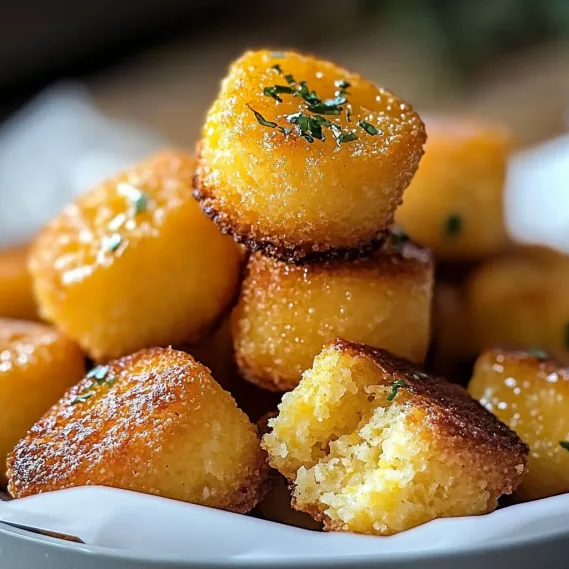
After you get the hang of the basic recipe, try these tasty twists: mix in 1/4 cup finely chopped jalapeños (with seeds taken out) for a spicy kick that works great with the sweet glaze; add 1/2 cup shredded sharp cheddar for a savory flavor; or throw in 1/3 cup fresh corn kernels for extra sweetness and texture. For something really special, mix 1/4 cup cooked, crumbled bacon into the batter and add a tiny bit of black pepper to the glaze for an amazing sweet-salty combo.
Keeping Them Fresh
Keep unglazed poppers in a sealed container at room temperature for up to two days, or freeze them for up to three months. Let frozen ones thaw on the counter, then warm them in a 350°F oven for about 5-7 minutes. Always put fresh glaze on after reheating for the best taste and look. If you end up with leftover glazed poppers, keep them in a sealed container at room temperature for no more than a day. Don't put them in the fridge - they'll just dry out.
 Pin it
These Southern-Style Honey Butter Cornbread Poppers have grown into more than just food in my home - they've become part of our traditions. There's something about these little bites that brings folks together, whether they're gathering around the oven waiting for them to come out or passing them around at dinner. They capture what Southern cooking is all about: taking simple ingredients and turning them into something special that creates lasting memories around the table.
Frequently Asked Questions
- → Can I prepare these mini cornbreads ahead of time?
- Sure! You can bake them up to two days in advance. Just keep them sealed in a container at room temperature. Pop them in a 300°F oven for about 5 minutes when you're ready to serve. If you're making the batter early, it can sit in the fridge for up to a day. Remember to let it warm up for 15 minutes before baking.
- → What can I use instead of buttermilk?
- If you're out of buttermilk, no worries! Take a glass, add a tablespoon of vinegar or lemon juice, then fill it with milk until it hits the 1-cup line. Let this sit for about 5 minutes. You also can swap in plain yogurt or sour cream, thinned with a splash of milk.
- → Can I freeze these cornbread mini bites?
- Definitely! Let them cool completely, place them in a single layer on a sheet to freeze solid, then store in a sealed container or bag for up to three months. Reheat straight from frozen in a 350°F oven for 8–10 minutes. Glaze them fresh with honey butter after warming.
- → What if I don’t have a mini muffin tin?
- You can use a standard muffin tray instead! Fill each about 2/3 full, then bake for 15–18 minutes, checking with a toothpick. You'll get a dozen regular muffins instead of the mini ones with the same delicious honey butter glaze.
- → How do I make these poppers gluten-free?
- Swap the all-purpose flour with a baking-friendly gluten-free flour mix (1:1). Ensure your cornmeal is gluten-free too, as some are processed with wheat. If your flour lacks xanthan gum, add 1/4 teaspoon to help the texture hold. They might be slightly softer but still delicious!
- → What dishes do these sweet bites go with?
- These are great with hearty soups, chili, stews, or barbecue favorites like pulled pork or ribs. Southern classics like fried chicken or collard greens? Perfect combo! Pair them with a crisp salad to add a sweet surprise.