
 Pin it
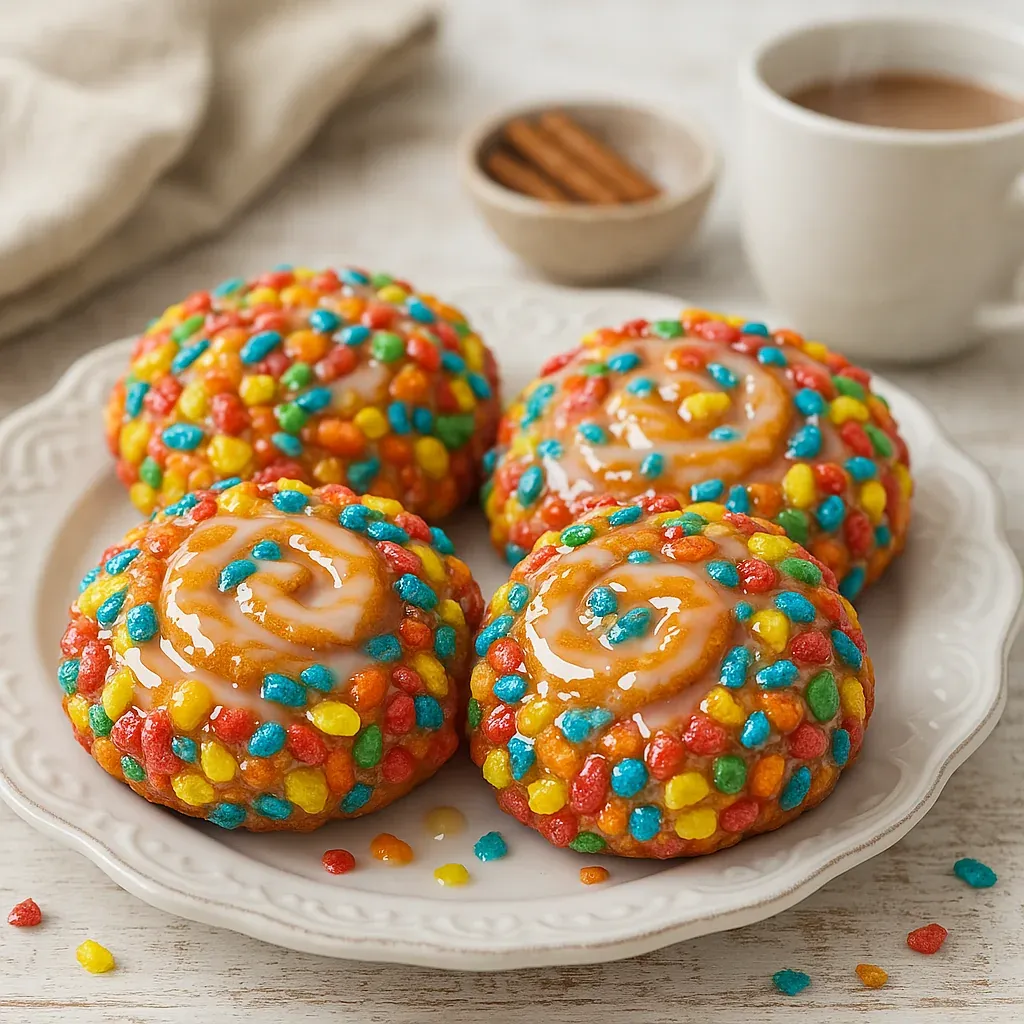
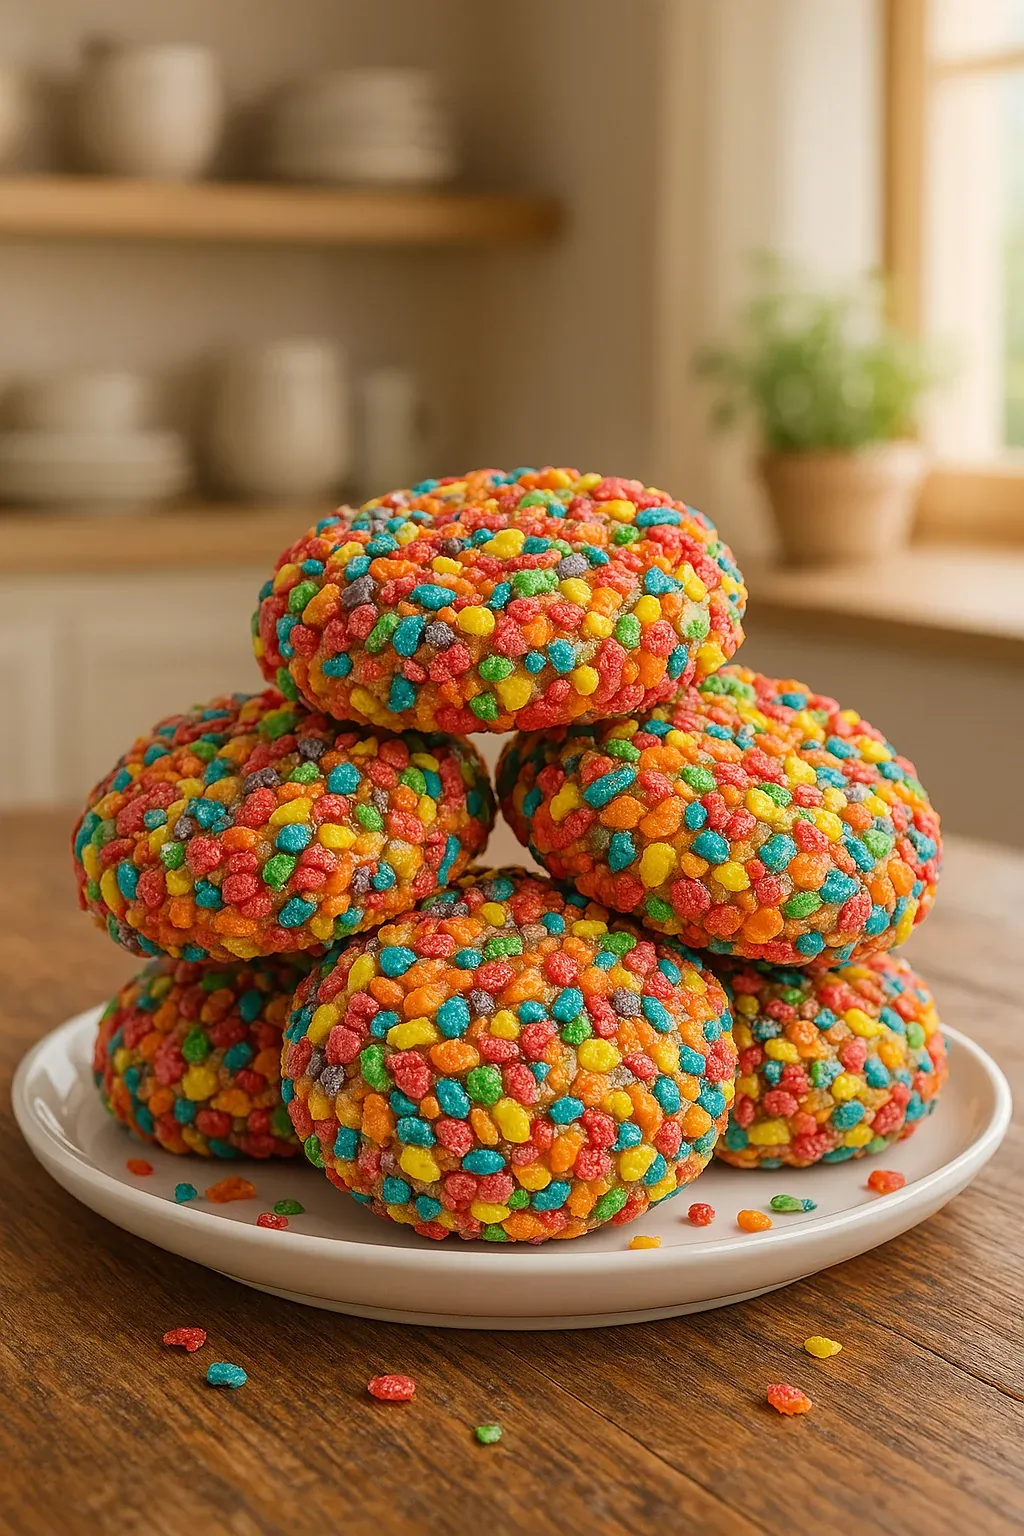
This melt-in-your-mouth Fruity Pebbles cookie turns a favorite kids' cereal into a soft, gooey treat that'll take you back to your childhood days. Every bite comes with bright cereal bits that add fruity taste and a nice little crunch against the soft cookie base.
I whipped these cookies up for my niece's rainbow party the first time, and they vanished faster than anything else on the dessert table. Now my family asks for them at pretty much every get-together because nobody – grown-ups or kids – can turn down their fun, memory-triggering charm.
What You'll Need
- Brown sugar: brings moisture and a hint of caramel that works well with the fruit flavors
- Salt: cuts through sweetness and makes all the other flavors pop
- Fruity Pebbles cereal: delivers the iconic rainbow look and fruity taste
- White chocolate chips: not required but they add little pockets of creamy sweetness
- Unsalted butter: room temperature for that wonderful tender texture
- Granulated sugar: gives sweetness and helps make those slightly crisp edges
- Large egg: holds everything together and adds a rich feel
- Vanilla extract: boosts the overall taste without taking over
- All-purpose flour: creates structure while keeping things soft
- Baking soda: gives the right lift and that perfect chewy bite
Making Your Cookies
- Cool and Enjoy:
- Let cookies sit on the hot pan for 5 minutes before moving to a cooling rack. This quick rest helps them firm up so they won't fall apart when moved.
- Bake to Perfection:
- Put them in the oven for 8 to 10 minutes until just golden at the edges but still soft in the middle. They'll keep firming up after you take them out, so pulling them early keeps them nice and chewy.
- Shape Cookies:
- Grab about 2 tablespoons of dough, roll into balls, and put them around 2 inches apart on your baking sheet. For a prettier look, stick some extra cereal pieces on top.
- Fold in Cereal and Chips:
- Gently mix in the Fruity Pebbles and white chocolate chips if using. Work carefully but don't take too long – you want to avoid crushing the cereal while making sure it's spread out evenly.
- Mix Wet and Dry:
- Slowly add your flour mix to the butter mix, stirring just until it comes together. Don't go overboard with mixing here or your cookies might end up tough.
- Combine Dry Ingredients:
- In another bowl, stir together flour, baking soda and salt until mixed well. This makes sure the baking soda gets evenly spread for cookies that rise properly.
- Add Egg and Vanilla:
- Mix in your egg and vanilla until everything looks smooth and shiny. Don't forget to scrape down the bowl sides so everything gets mixed in properly.
- Cream Butter and Sugars:
- In a big bowl, beat your soft butter with both types of sugar for a full 3 minutes until it looks lighter and fluffy. This step puts air in the mix which helps make your cookies tender.
- Preheat Oven:
- Turn your oven to 350°F and line your cookie sheets with parchment paper. The paper keeps cookies from sticking, makes cleanup a breeze, and helps the bottoms brown evenly.
 Pin it
Fruity Pebbles was always the cereal I begged for as a kid. I can still remember grabbing extra handfuls when Mom looked away, which is probably why putting them in cookies feels so fun and sneaky. What's cool is how the fruit flavor gets even stronger when baked, making something I actually like better than just eating the cereal straight.
Keeping Them Fresh
Keep these treats in a sealed container at room temp and they'll stay yummy for about four days. Put some parchment between layers so they don't stick and to keep those pretty cereal pieces looking good. You can stick them in the fridge for a week, but they might get harder than you'd like. If you want them around longer, freeze the raw cookie dough balls on a tray first, then drop them in a freezer bag once they're solid. Then you can bake fresh cookies whenever you want – just add another minute or two to the cooking time.
Use New Cereal
Always grab a fresh box of Fruity Pebbles for the best cookies. New cereal keeps its bright colors and stays crunchy, while older stuff might get mushy when you bake it. Want extra crunch? Save some cereal to push into the tops of your cookies right after they come out of the oven. This looks really cool and makes sure you get that satisfying crunch in every bite.
 Pin it
What To Serve Them With
These bright cookies go great with a cold glass of milk that balances out their sweetness. For a fun breakfast-inspired dessert, try them next to vanilla ice cream topped with some crushed Fruity Pebbles. They're perfect for birthday parties, especially on colorful plates that match the rainbow bits in the cookies. Their happy look makes them awesome for school lunches, classroom treats, or anytime you need to cheer someone up.
Frequently Asked Questions
- → What keeps the cookies soft and chewy?
For chewy cookies, pull them out of the oven as soon as the edges firm up, but leave the centers soft. Don't overbake!
- → Can I replace Fruity Pebbles with another cereal?
Yep! You can swap Fruity Pebbles for Cocoa Pebbles, Fruit Loops, or a favorite cereal you prefer.
- → What fun toppings can I try?
Add a pop with white chocolate drizzle, more Fruity Pebbles on top, or some colorful rainbow sprinkles!
- → How do I make these gluten-free?
Use a 1-to-1 gluten-free flour blend in place of regular flour to make these gluten-free.
- → What's the best way to store them fresh?
Keep them in a sealed container for 4 days at room temperature or up to a week in the fridge. Freeze unbaked dough for 3 months if needed.
- → Can I mix in other flavors?
Sure! Add a citrus twist with zest, some cocoa for chocolate flavor, or experiment with combining a variety of cereals.