
 Pin it
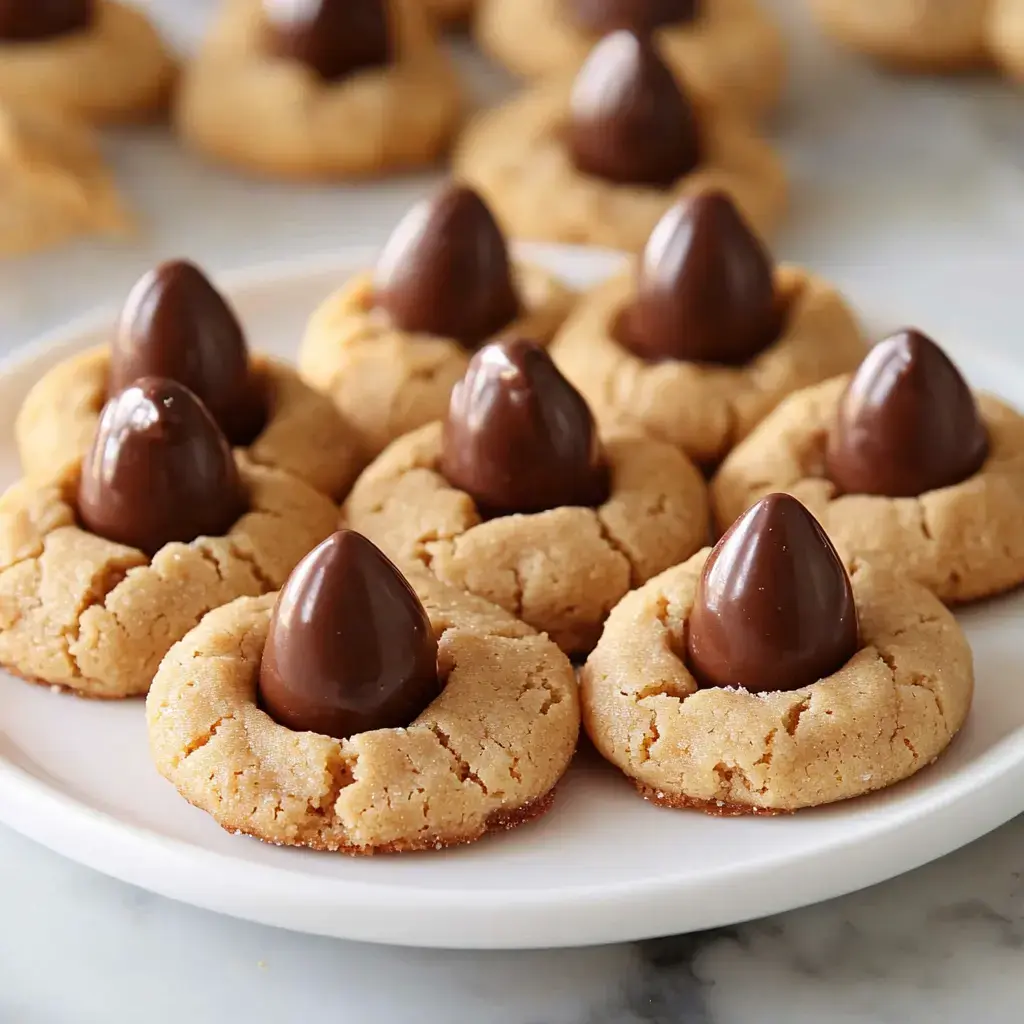
Delightful Peanut Butter Blossoms
I gotta tell you about these wonderful cookies that have become a holiday staple in my home. These no-fuss peanut butter blossoms mix soft, nutty cookies with a yummy chocolate kiss crowning each one. They're always the first to vanish from any cookie tray. What's great? They're super quick to whip up but look like you've been baking all day. Whether you need something for a Christmas cookie swap or just want to satisfy your sweet tooth, these treats always hit the spot.
What Makes This Recipe So Good
- The cookies turn out tender and gooey with that dreamy chocolate middle
- Needs common ingredients you've probably got in your kitchen already
- Bakes enough to go around (if you can stop munching on them)
- Simple to switch up with different kiss types or sugar colors for any event
- Great to bake with little ones - they'll enjoy coating the dough balls in sugar
Simple Ingredients You'll Need
- Peanut Butter: Grab the smooth type that doesn't separate, it creates the nicest cookie consistency.
- Butter: Get it properly softened by leaving it out for a while before you start.
- Double Sugar: White and brown sugars team up for just the right sweetness level.
- Egg: Bring it to room temp for better dough blending.
- All-Purpose Flour: Make sure you measure accurately, excess flour leads to crumbly cookies.
- Hershey's Kisses: The traditional milk chocolate ones work great but feel free to try others.
- Vanilla Extract: Just a tiny bit enhances all the flavors.
- Baking Basics: Don't skimp on the baking soda and salt – they're crucial components.
How To Make Them Step By Step
- Create Your Cookie Foundation
- In a bowl, blend the softened butter and peanut butter till completely smooth - roughly 2 minutes. Toss in both sugars and mix until it becomes airy and light, about 3 more minutes. Add your egg and vanilla, then stir until everything looks silky and combined.
- Combine The Dough Carefully
- Now for the careful part - slowly add your flour, baking soda, and salt, mixing at low speed. You'll want to stir just until everything comes together into a soft, peanutty mixture. Run your spatula around the bowl to catch any unmixed ingredients.
- Form Your Cookie Balls
- Make small 1-inch balls from your dough - a small scoop works wonders here. Roll them in regular sugar until they're completely coated. Set them on your lined cookie sheets, leaving space between each one. If your kitchen feels hot, stick the shaped dough in the fridge for 15 minutes to cool down.
- Bake Them Just Right
- Put your trays in your 375°F preheated oven. They'll cook in about 8-10 minutes - watch for slightly puffy centers and edges that are starting to firm up. While they bake, get all your kisses unwrapped and ready.
- Add The Chocolate Touch
- This part needs good timing - right when those cookies come out, push a chocolate kiss into the middle of each cookie. The warm cookie will cradle that chocolate perfectly. Let them sit on the baking sheet for about 5 minutes before moving them to cool completely.
Tricks For Perfect Results
- Watch Your Temps: Ingredients at room temperature will combine into the creamiest dough.
- Flour Tip: Use a spoon to fill your measuring cup then level it off for the right amount.
- Cooling Helps: If your cookies spread too thin, cooling the dough will fix that issue.
- Kiss Tip: Stick those chocolate kisses in the freezer while your cookies bake - they won't melt as quickly.
- Get Creative: Experiment with different Hershey's kiss flavors to make unique variations.
 Pin it
Ways To Enjoy Them
- Pairing them with a glass of cold milk or mug of hot cocoa
- Including them on holiday cookie assortments
- Wrapping them up as thoughtful homemade presents
- Using them to create ice cream sandwiches when it's hot out
- Creating a fun decoration station with various colored sugars
Keeping Them Fresh
- Store your cookies in a sealed container for up to 5 days to maintain freshness
- Pop baked cookies in the freezer for up to 3 months in a sealed bag
- Prepare the dough beforehand and store in the fridge for 2 days
- Form the cookies and freeze them uncooked for easy baking later on
- Allow frozen cookies to warm up at room temperature before eating
- When giving as gifts, place wax paper between layers to keep them pristine
Frequently Asked Questions
- → Why use a room-temp egg?
Makes mixing easier and smoother.
- → Which peanut butter is best?
Go for no-stir, creamy versions.
- → Should I chill the chocolate candies?
Optional but helps hold their shape better.
- → Why measure flour exactly right?
Avoids cookies turning out too dry. Use a scale if you have one.
- → How long do these cookies stay fresh?
They last about 7 days when stored airtight.
- → Can these be frozen?
Absolutely. Store them without the chocolate for up to 3 months.