
 Pin it
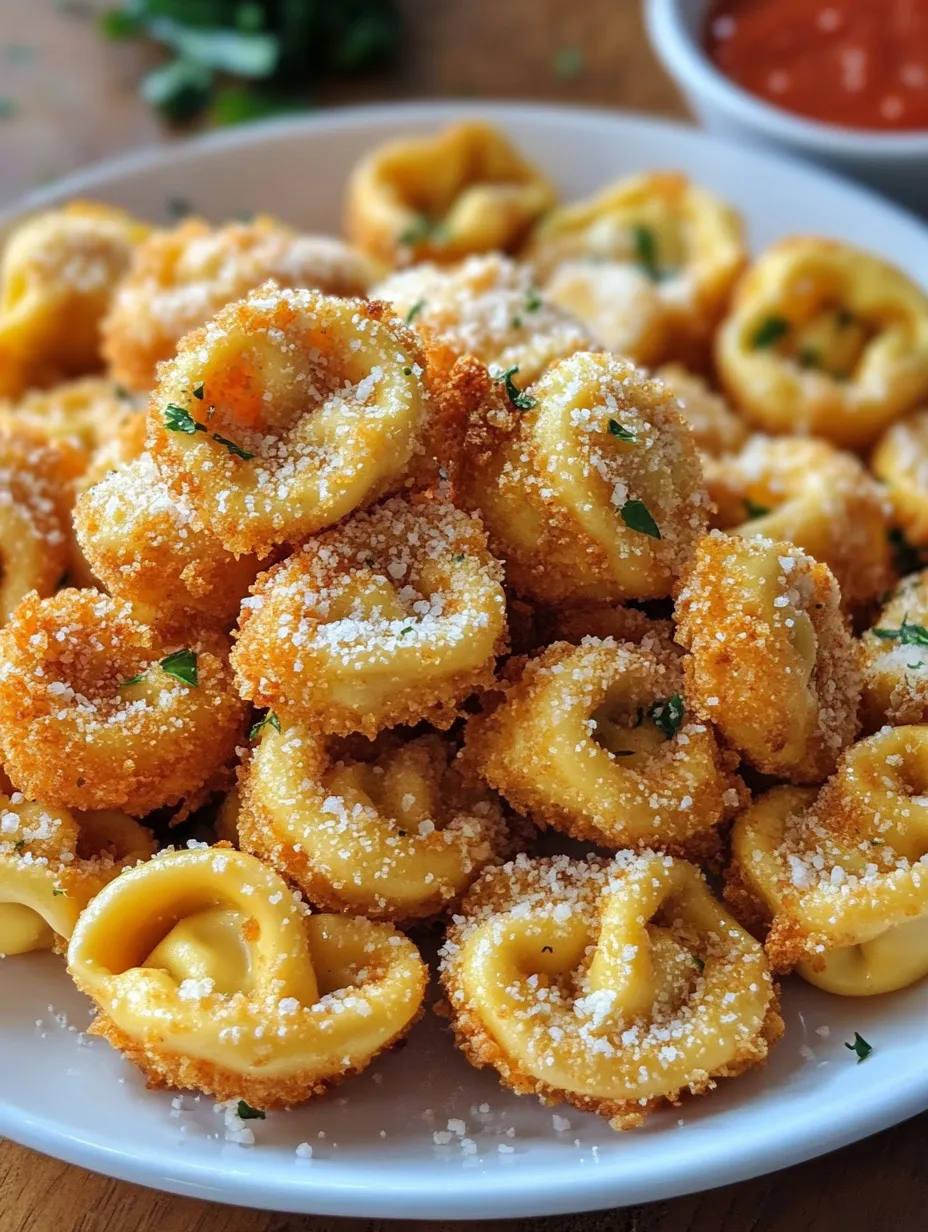
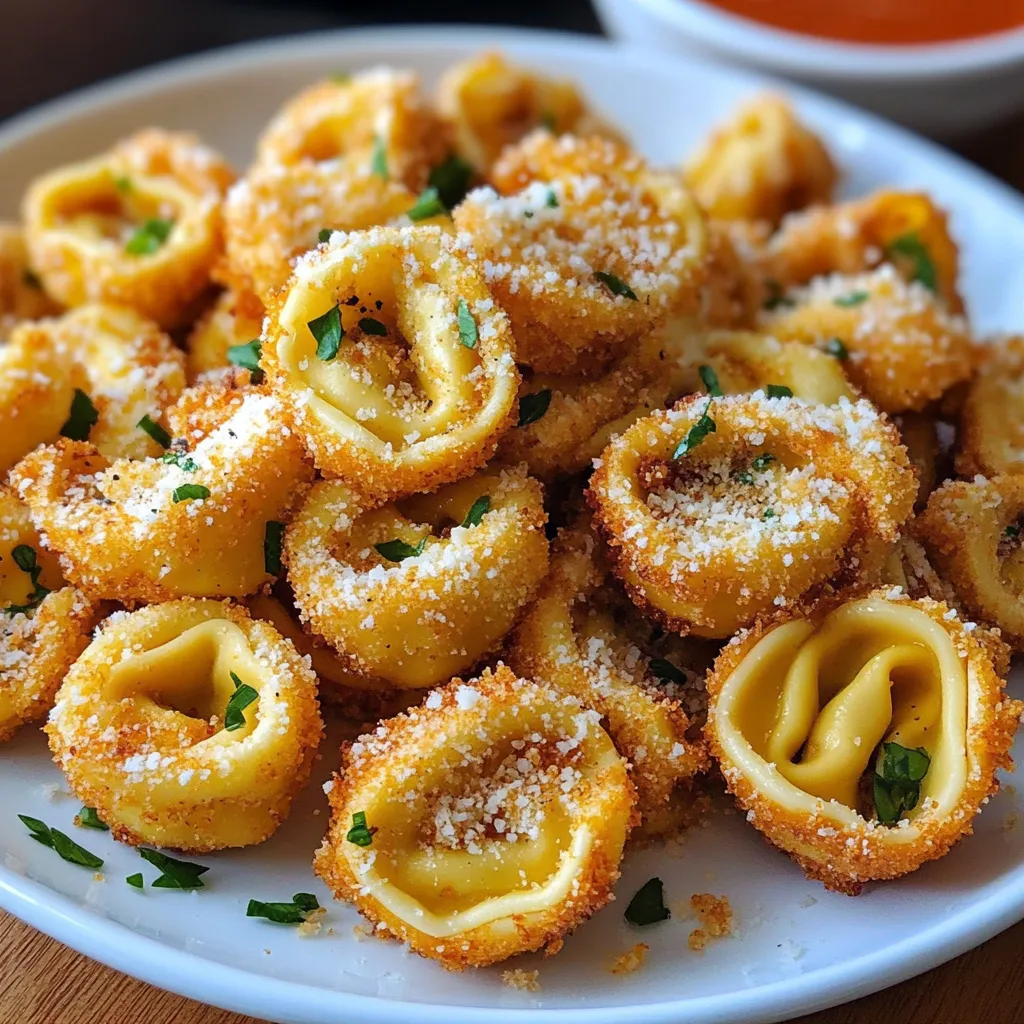
Golden Parmesan Tortellini Bites turn ordinary cheese-stuffed pasta into crunchy, mouthwatering snacks. You'll fall for that amazing contrast between the crisp outer shell and soft, gooey middle. The first batch I whipped up left me stunned—who knew such a basic cooking method could turn tortellini into such an irresistible starter? They vanished from the plate almost the moment I put them down.
I made these during our family board game evening last week, and my picky nephew who typically steers clear of any pasta shocked everyone by asking me how to make them after his third helping. Want to know what makes them so good? It's all about taking your time to coat each piece properly and watching your oil temp.
Key Ingredients and Shopping Advice
- Cheese Tortellini: Grab refrigerated or fresh ones for the best results
- Parmesan Cheese: Grate it yourself instead of buying pre-shredded for better taste
- Italian Breadcrumbs: The pre-seasoned kind saves you extra steps
- Garlic Powder: Adds yummy flavor without being too strong
- Italian Seasoning: Brings nice herby notes to the mix
- Cooking Oil: Grab canola or vegetable for their neutral flavor
Step-by-Step Cooking Guide
- Boil Pasta: Cook tortellini until barely al dente, roughly 2-3 minutes for fresh ones. They'll cook more during frying, so keep them slightly firm to avoid sogginess.
- Set Up Coating Area: Line up three shallow dishes: put flour with salt in the first, whisk eggs with a bit of water in the second, and mix breadcrumbs with Parmesan and seasonings in the third.
- Remove Moisture: Drain pasta and lay on paper towels. Pat completely dry on all sides—any water will make the coating slide off and cause dangerous oil splatter.
- Bread Each Piece: Keep one hand for dry stuff and one for wet—roll each tortellini in flour, tap off extra, dunk in egg, then cover with breadcrumb mix, pressing gently so it sticks.
- Warm Your Oil: Fill a heavy pan with oil about 1-inch deep and heat to 350°F. Test by dropping in a breadcrumb—it should bubble gently but not burn. Keep this temp steady throughout cooking.
- Cook Small Groups: Fry tortellini in small batches for 2-3 minutes until they turn golden, flipping once halfway. Don't pack the pan or they won't cook evenly.
- Let Oil Drain: Scoop them out with a slotted spoon onto paper towels to soak up extra oil, then move to a wire rack so they don't get soggy sitting in their own steam.
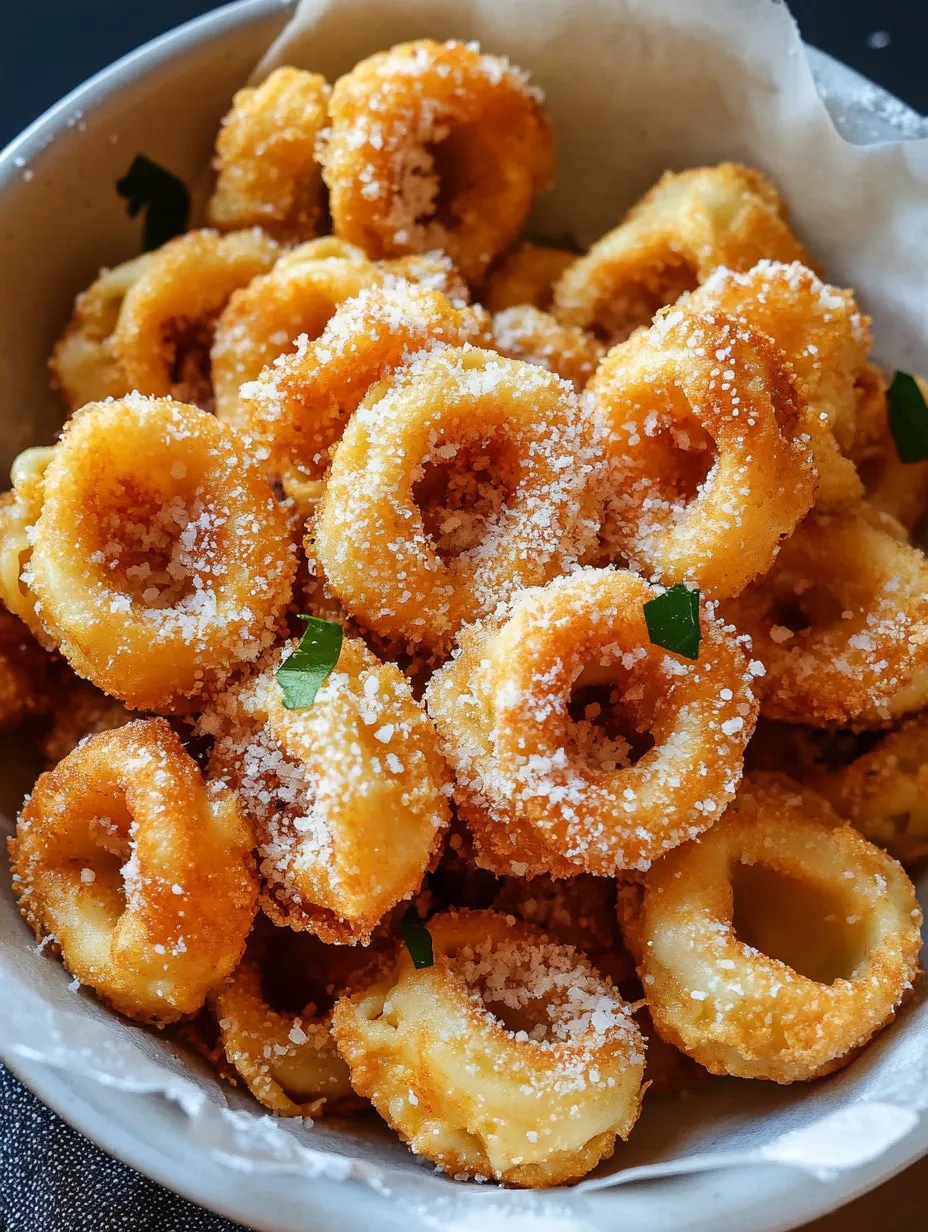
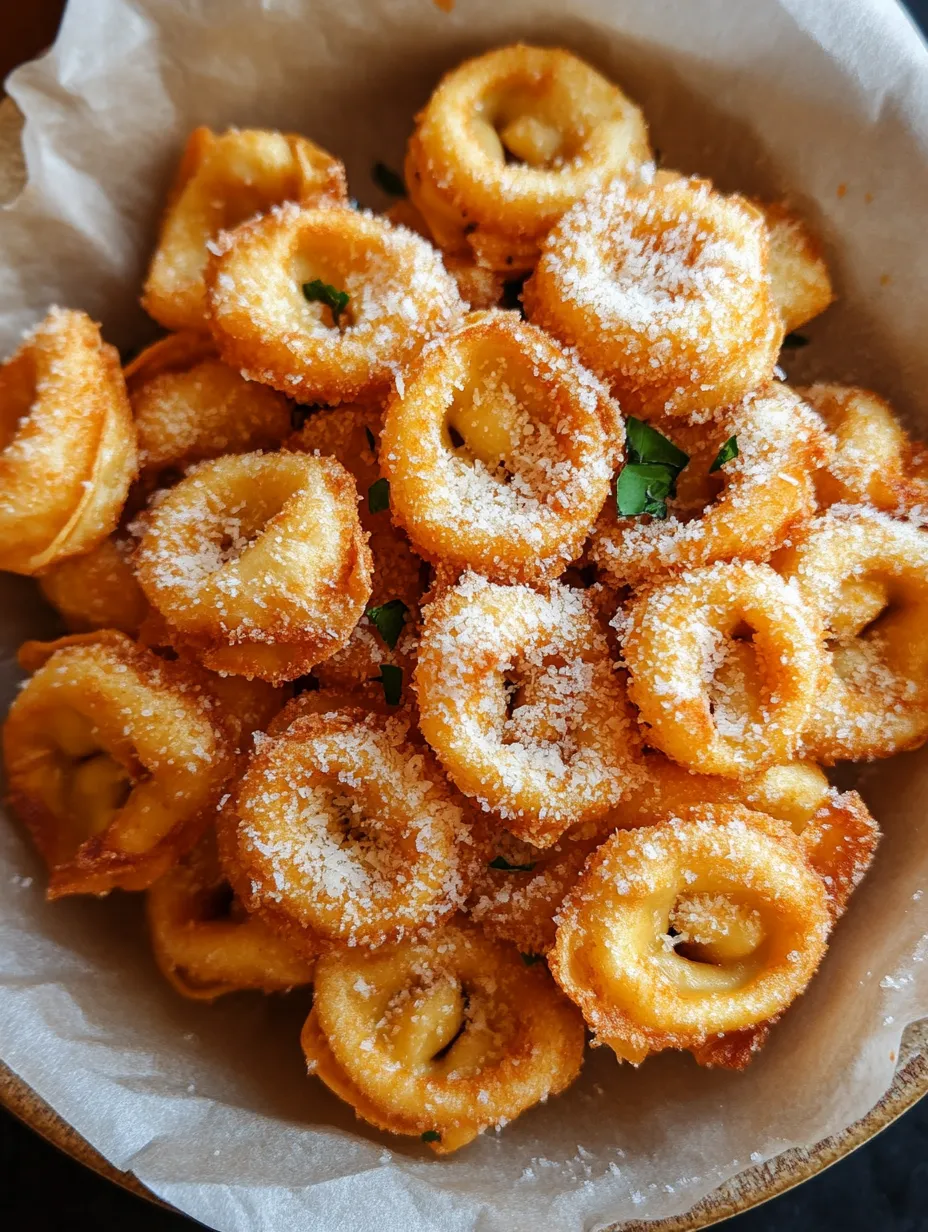
- Add Final Flavors: Sprinkle with salt and more Parmesan right away while they're hot. The warmth helps the seasonings stick and slightly melt for better flavor.
- Hold Them Hot: Put finished batches on a baking sheet in a 200°F oven while cooking the rest. Spread them out so they stay crispy all around.
- Eat Right Away: Put them on a serving plate with warm marinara, garlic mayo, or pesto for dipping. Add some fresh herbs and enjoy while they're hot for the best taste and crunch.
 Pin it
My nonna always told me good frying needs patience and focus. "Look at the bubbles," she'd remind me, "they show you everything you need to know about your oil."
Tasty Pairing Ideas
These versatile bites work great for parties or casual snacking with different dips. Try them with marinara for that Italian vibe, garlic mayo for something rich, or pesto for a herby kick. I've thrown them on antipasto boards, floated them in soup, and even used them to top Caesar salads. For my daughter's graduation celebration, I created a dipping station with various sauces that everyone couldn't stop talking about.
 Pin it
Prep-Ahead Tricks
Want to get ahead? Bread your tortellini and freeze them in a single layer, then stick them in freezer bags. They'll stay good for up to a month and can go straight from freezer to fryer (just add a minute or two to the cooking time). This trick is so handy for surprise guests. Last holiday season, I prepped these weeks before Christmas, which was a huge timesaver during the busy festivities.
Lighter Cooking Methods
While deep frying gives you the ultimate crunch, air fryers offer a less oily option. Coat them the same way, give them a light spray of oil, and air fry at 375°F for 8-10 minutes. They'll have a slightly different texture but still hit the spot when you're craving something crunchy. My health-conscious sister makes them this way and says her kids can't spot the difference.
Fixing Common Problems
If your coating falls off during cooking, your pasta was probably still wet or your oil wasn't hot enough. If they're turning brown too fast on the outside but staying cool inside, your oil's too hot. Perfect fried tortellini need about 2-3 minutes to reach golden brown, which gives the inside just enough time to warm up completely.
I figured these tricks out the hard way, like the time I rushed and skipped drying the tortellini thoroughly, ending up with a messy coating that fell apart. Now I take it slow with every step.
 Pin it
Closing Thoughts
Making these crunchy treats connects me to my family's cooking history while letting me add my own touches. They've become my signature dish at potlucks and the first thing friends ask for when they visit. My favorite part is watching people's faces light up when they bite into what looks like a simple snack but delivers such amazing texture and flavor. These golden bites show how taking everyday ingredients and treating them with care creates something really special. Whether you're feeding a crowd or just treating yourself, these crunchy tortellini bring a little joy to every bite. They've become my go-to when I want to wow people without spending forever in the kitchen.
Frequently Asked Questions
- → Can I cook these in an air fryer?
- Absolutely! Cook at 375°F for 8-10 minutes, flipping halfway, until crispy and golden.
- → Can I prepare them beforehand?
- They're best fresh, but you can reheat them in the oven at 350°F until they crisp up again.
- → What dips go well with this?
- Marinara, pesto, alfredo, or even ranch will taste amazing with these!
- → Can frozen tortellini be used?
- Fresh ones are ideal, but if you’re using frozen, make sure to thaw and cook them first.
- → How will the breading stay on better?
- Dry the tortellini thoroughly before breading and press the coating on tightly to keep it in place.