
 Pin it
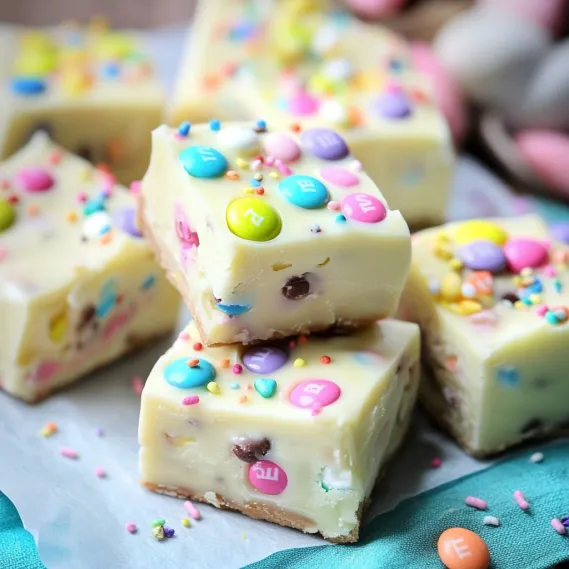
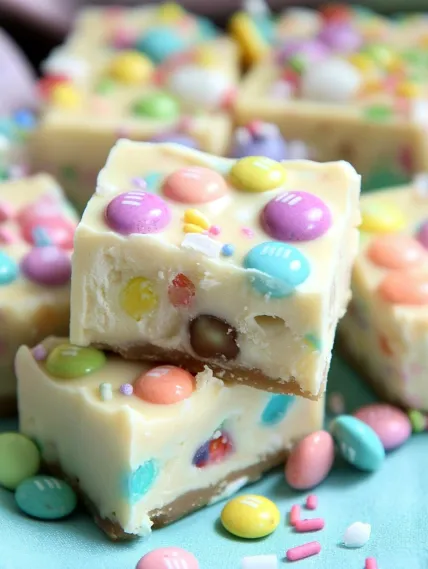
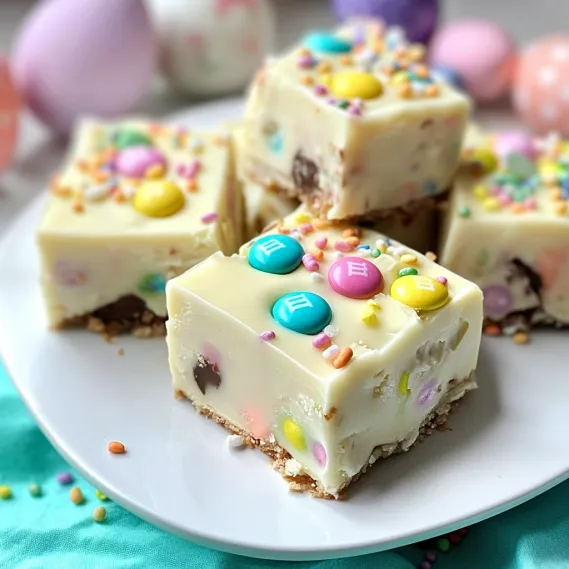
I've made this smooth Easter fudge my yearly springtime ritual, crafting unforgettable goodies that everybody from little ones to grown-ups can't wait to taste. The bright Easter-inspired sweets turn basic white chocolate fudge into a fun celebration that's as pretty to look at as it is yummy to eat.
I first whipped up this fudge on a wet spring weekend when I had my nieces and nephews over. They couldn't stop smiling when they saw the colorful treats, and now they always ask for "the candy rainbow squares" whenever we get together for Easter.
- White chocolate chips: make up the soft foundation of this fudge. Go for good quality ones that list cocoa butter on the package for the creamiest results.
- Sweetened condensed milk: gives you that perfect fudgy texture without worrying about exact temperatures or sugar problems.
- Butter: brings extra richness and helps create that melt-away feeling in your mouth. Pick unsalted so you can control how it tastes.
- Easter themed M&Ms: add pops of color and chocolate crunch. Their soft pastel shades match the spring holiday perfectly.
- Whopper Easter eggs: throw in a different kind of crunch with their malty centers and fun holiday look.
- Easter sprinkles: make everything more festive and eye-catching. Go for springtime colors to boost the Easter feeling.
Simple Making Guide
- Get Your Pan Ready:
- Put parchment paper in an 8×8 inch square pan, letting it hang over the sides so you can pull out the fudge later. Make sure the paper lays flat for nice smooth edges.
- Create Your Mixture:
- Put white chocolate chips, sweetened condensed milk, and butter in a pot over low-medium heat. Keep stirring so nothing burns. You want everything to turn completely smooth and shiny, which takes about 5-7 minutes.
- Mix In The Goodies:
- After your chocolate mix is all melted, take it off the heat and quickly stir in 1 cup each of M&Ms, whopper eggs, and sprinkles. Work fast but gentle so the candies don't melt away. You're trying to spread them out evenly while keeping their shapes and colors.
- Fill And Top:
- Dump the fudge mix into your ready pan and use a spatula to push it into all the corners. While it's still warm and sticky on top, scatter the leftover candies and sprinkles across it, pushing them in slightly so they stick.
- Wait And Cut:
- Let the fudge sit out until it gets completely firm, which takes overnight. You'll need to be patient for the best texture. When it's hard, lift the whole block out using the paper edges. Use a sharp knife to cut it into 1-inch squares for perfect little bites.
 Pin it
The bright colors in this fudge always remind me of hunting Easter eggs when I was little. I really love using those shiny whopper eggs because they add something extra festive that makes this treat feel truly special for the holiday.
Keeping Your Fudge Fresh
Store your fudge in a container that seals tight, with parchment paper between each layer so they don't stick together. It'll stay tasty for a week at room temperature. Want to keep it longer? Pop it in the fridge for up to two weeks. You can even freeze it for three months if you wrap it tightly in plastic and put it in a freezer bag. Just let frozen fudge warm up in the fridge before you eat it.
 Pin it
Mix It Up Options
Feel free to switch things around based on what your family likes. Try using pastel chocolate chips with some of the white chocolate for a swirly look. Other Easter candies work great too - jelly beans, tiny chocolate eggs, or chopped up chocolate bunnies can replace any of the mix-ins. If you like nuts, throw in 1/2 cup of chopped almonds or pecans for a nice crunchy contrast against the smooth fudge base.
Sharing Your Sweet Treats
Turn this tasty treat into thoughtful Easter presents by putting squares in bright see-through bags tied with pastel ribbons. For something fancier, arrange fudge pieces in Easter tins or small baskets with Easter grass underneath. Add a handwritten recipe card for a personal touch that friends and family will love. These sweet gifts are just right for teachers, neighbors, or anyone who deserves a special spring surprise.
Sweet History
Americans have loved fudge since the late 1800s, when someone supposedly messed up a batch of caramel by accident. Holiday-themed fudge got popular in the 1950s as families wanted homemade treats for special times. This Easter version keeps that tradition going, bringing everyone together around a sweet centerpiece that celebrates spring and all the joy that comes with Easter.
Frequently Asked Questions
- → Is milk chocolate a good option instead of white chocolate?
You can go for milk chocolate to change up the taste, but it won’t have the same bright, festive look for Easter.
- → How much time does it need to firm up?
Leave it overnight at room temperature, or if you're in a rush, chill for 3-4 hours in the fridge.
- → Can I switch up the toppings for something else?
Absolutely! Get creative with candies like jelly beans or pastel-colored chocolates to make it your own.
- → Will this fudge freeze well for later?
Yes, store it in an airtight container in the freezer for up to 3 months. Let it come to room temperature before eating.
- → How do I change this for other celebrations?
Swap the Easter candies and sprinkles for seasonal ones, like reds and greens for Christmas or pinks for Valentine’s.