
 Pin it
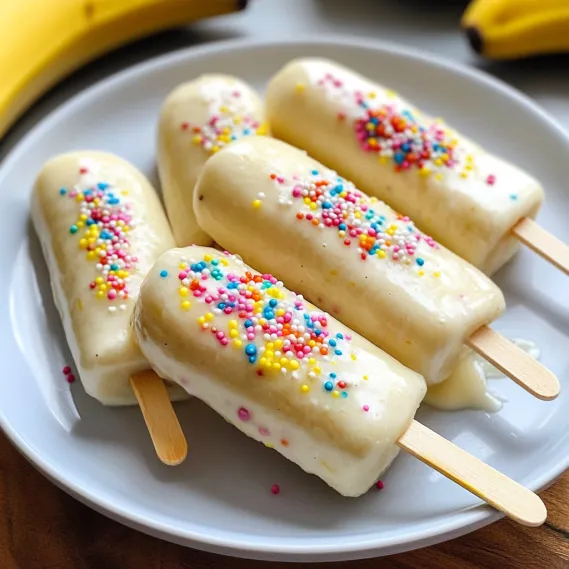
These Banana Yogurt Freezer Sticks are summer joy on a stick. Ripe, velvety bananas wrapped in zesty yogurt and topped with fun garnishes make a snack that's both good for you and tasty too. I came up with this easy treat during an incredibly hot summer when my kids kept asking for ice cream. Looking for a middle ground between their sweet tooth and my wish to give them something nutritious, these frozen goodies became our family's favorite warm-weather treat. They need almost no prep work and just three basic ingredients, giving you all the excitement of a frozen dessert plus the goodness of actual fruit and protein-rich yogurt.
During break last year, I put together a make-your-own banana stick station for my daughter's friends with different yogurt options and various toppings. It kept six lively 7-year-olds busy for a solid half hour, and later one mom sent me a message saying her super fussy child had asked to make "those banana cold treats" at their house. That's the kind of food victory that makes you feel like you've somehow figured out a small piece of the parenting puzzle!
Vital Components and Shopping Guidance
- Bananas: Go for bananas that are ripe (yellow with a couple tiny brown marks) but not too soft. If they're too green, they won't be sweet enough; if they're too spotted, they'll be mushy and harder to coat well. Their natural sweetness and smooth texture when frozen makes bananas the ideal foundation for these snacks
- Yogurt: Vanilla yogurt works wonderfully with banana, but feel free to try others like strawberry or chocolate. Greek yogurt packs more protein, while standard yogurt makes a thinner coating that's a bit easier to spread
- Toppings: While bright sprinkles always wow the kids, think about other choices like diced nuts, tiny chocolate chips, crunchy cereal, smashed graham crackers, grated coconut, or crushed dry fruit. These add crunch, flavor, and eye-catching appeal to your banana sticks
What makes this snack so great is how simple and adaptable it is. You can tweak each pop to match different tastes, which works perfectly for families where everyone likes something different. I've learned that creating a "topping station" and letting everyone design their own turns a basic snack into something really fun to do together.
Step-by-Step Making Process
- Step 1: Banana Prep Done Right
- Slice your bananas in half the short way instead of lengthwise to get the best size for pops that small hands can easily hold. Don't forget to peel them before putting in the stick – sounds simple, but I've definitely had moments where I almost skipped this key step! For better yogurt sticking power, you can put the naked banana halves in the freezer for around 15 minutes before coating them.
- Step 2: Proper Stick Placement
- Push the popsicle stick about halfway into the cut part of the banana, taking care not to push too hard or you might break the fruit. Hold the banana gently but firmly, and turn the stick slightly as you push it in to avoid making splits. If you're working with little kids, it's smart to handle this part yourself while they focus on the fun decorating stuff.
- Step 3: Smart Yogurt Coating
- Using a spoon to put yogurt on the banana works better than dipping, especially with young helpers. Hold the banana over a bowl and turn it slowly while spooning on the yogurt for even coverage. Let extra yogurt drip off for a moment to avoid puddles on your paper. Work quickly but carefully – finding that sweet spot takes a little practice.
- Step 4: Adding Toppings
- Put your sprinkles or other goodies on right after covering each banana with yogurt, before it starts to set. The yogurt works as the sticky base that keeps your toppings in place, so timing really matters. Gently roll the banana in a flat dish of toppings or sprinkle them straight onto the coated banana, turning to cover every side. Press them softly to make sure they stick.
- Step 5: Freezing Tips
- Place your decorated bananas on parchment or wax paper with room between them so they don't stick together. A flat cookie sheet or plate that can fit in your freezer works great. For extra stability, you can rest the sticks between the bars of a cooling rack to keep the bananas lifted while freezing. Freeze for at least 2 hours until the yogurt gets firm, or 3-4 hours for completely frozen bananas.
 Pin it
My first try making these was quite the learning curve – I tried dipping bananas straight into a small yogurt container, which ended with yogurt splattered everywhere except on the bananas! Now I spoon the yogurt over instead, which gives me much better control and coverage. This tiny change made all the difference in how they look and how much fun we have making them.
Creative Serving Ideas
Make these simple treats even more special by including them as part of a summer treat platter. Set the pops alongside fresh fruit chunks, small cookies, and extra small dishes of toppings for a fun, create-your-own-dessert activity. For kids' parties, stand the pops upright in a bright container filled with ice chips to keep them cold longer. They're also perfect for snacking by the pool on hot days – just store them in a cooler until you're ready to eat them.
 Pin it
Flavor Twists to Try
After you've got the hang of the basic recipe, experiment with some creative changes that add more nutrition or special touches. I love pressing fresh blueberries or thin strawberry slices into the yogurt coating before freezing for extra color and taste. For a vacation vibe, try coconut yogurt and roll in toasted coconut flakes for a tropical-inspired treat that grown-ups enjoy as much as kids do. My personal favorite for busy mornings is coating them in protein-packed Greek yogurt and rolling in granola for a quick breakfast you can grab on your way out that feels like a treat but keeps you full for hours.
Keeping Them Fresh
These Banana Yogurt Freezer Sticks taste best when eaten within 1-2 days after making them, since bananas can turn brown and change texture when frozen too long. To store them, put the fully frozen pops in one layer in a sealed container, or wrap each pop separately in parchment paper then place in a freezer bag. If you're making lots at once, put parchment paper between layers to stop them from sticking together. For easy grab-and-go snacks, wrap individual frozen pops in parchment paper held with a bit of tape or string. This makes them simple to take from the freezer for quick snacks or lunch box treats.
 Pin it
These Banana Yogurt Freezer Sticks have grown into more than just a snack at our house – they've become a summer custom that signals the start of warm days and outdoor fun. What I really love about them is how they sit right between treat and healthy snack, handling sweet cravings while still giving real nutrition. The excitement on my kids' faces as they make their own custom pops is matched only by how much they enjoy eating what they've created. Sometimes the easiest recipes turn into the most cherished family favorites.
Frequently Asked Questions
- → Is Greek yogurt a good option for this?
- Definitely! Greek yogurt works great and adds more protein. It’s thicker, so you might need to stir in a little milk to thin it out for easy dipping. Its tangy taste pairs beautifully with sweet bananas.
- → What’s the best ripeness for bananas?
- Go for bananas that are yellow with a few brown spots. They should be ripe but firm enough to hold up during coating and freezing. Avoid very soft bananas as they can break apart.
- → How long can I keep these pops frozen?
- When properly wrapped or sealed in a container, they'll stay fresh for up to 2 weeks. After that, they’re still safe to eat but may lose quality and texture, becoming icy or prone to freezer burn.
- → Any healthier topping suggestions?
- Sure! Try crushed nuts, seeds, shredded coconut, granola, or freeze-dried fruits. Even a sprinkle of cocoa nibs or a bit of dark chocolate shavings can keep it wholesome yet tasty.
- → Why are my banana pops turning brown?
- If bananas brown before dipping, that’s just natural from air exposure. Work quickly and make sure to fully coat them in yogurt. If they brown in the freezer, they might need better wrapping to avoid freezer burn.
- → Can I make a vegan version of this?
- Absolutely! Replace the yogurt with a non-dairy option like coconut, almond, or soy yogurt. Some plant-based yogurts may need thickening with a bit of cornstarch to make dipping easier.