
 Pin it
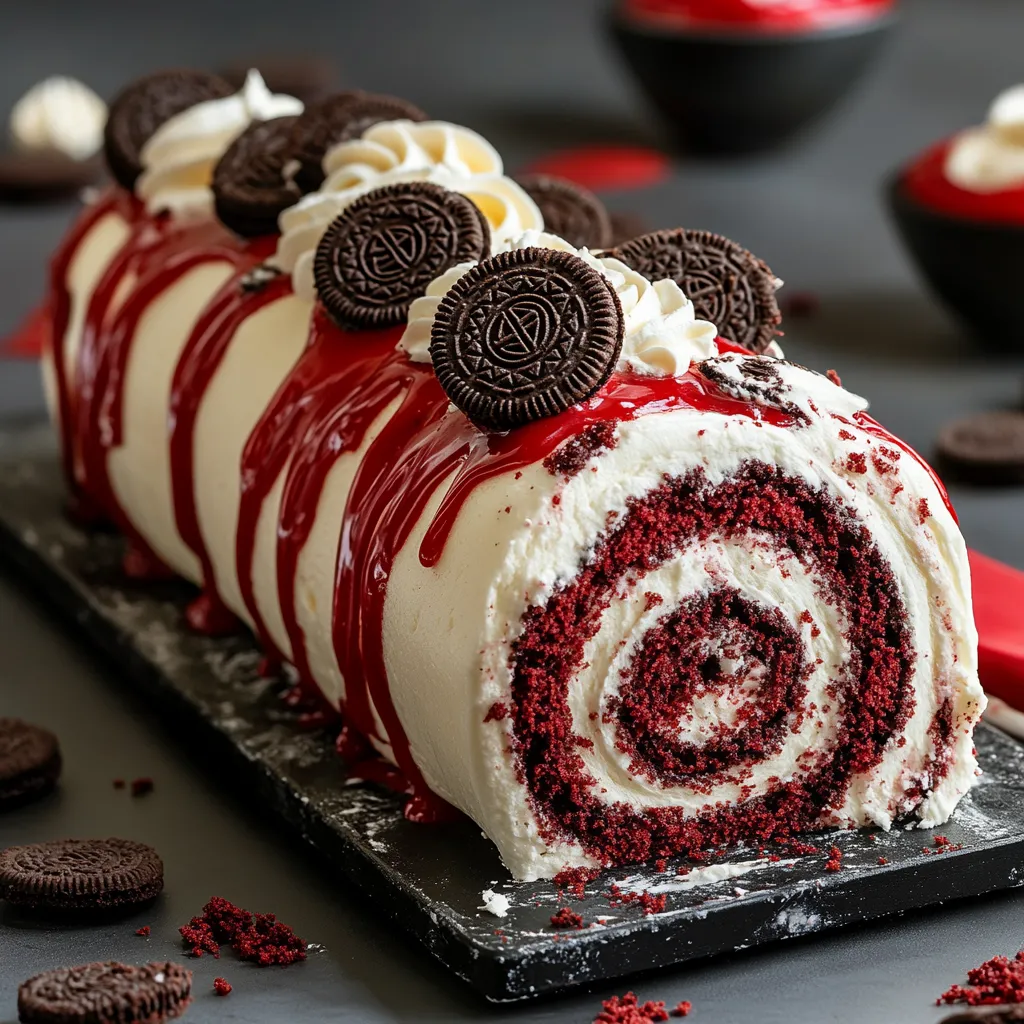
A Red Velvet Oreo Cake Roll brings together two favorite tastes in one eye-catching sweet treat. This head-turning dessert wraps a soft, bright red cake around a cookies-and-cream middle, topped with thick chocolate ganache. When you cut into it, the beautiful red swirl makes this treat look just as amazing as it tastes.
I whipped this up for my daughter's birthday party once, and everyone's jaws dropped when they saw the first slice. That bold contrast between the bright red cake and white filling really gets people talking.
Key Ingredients:
- All-purpose flour - grab unbleached for the softest cake texture
- Dutch-process cocoa powder - gives a deeper color and smoother taste than regular cocoa
- Buttermilk - makes the cake soft and boosts the red color
- Red food coloring - go for gel type for the brightest red without making the batter runny
- Cream cheese - try to use Philadelphia for the smoothest filling that won't get runny
- Oreos - stick with original ones, not Double Stuf, to get the right cookie-to-cream balance
- Heavy cream - needs at least 36% fat to make your ganache turn out smooth
Step-By-Step Guide:
- Set Up Everything First
- Get all your stuff out and let it warm up to room temp
- Get a clean kitchen towel ready with powdered sugar sprinkled on it
- Put your oven rack right in the middle
- Make sure your jelly roll pan is totally clean and dry
- Get The Cake Mix Just Right
- Whip eggs and sugar until they fall off the beater in thick streams
- Add dry stuff gently with figure-eight moves of your spatula
- Stop mixing as soon as you don't see flour streaks anymore
- Spread your batter all the way to the edges and corners
- Roll It Up Like A Pro
- Don't wait - roll while it's still hot
- Press firmly but don't squish it
- Keep everything snug without squeezing too hard
- Let it cool completely in the towel so it sets
- Whip Up The Filling
- Get the cream cheese totally smooth before you add any sugar
- Crush Oreos into different-sized pieces for a fun texture
- Don't spread filling too thick, especially near the edges
- Leave a little empty space at the edges to prevent mess
- Put It All Together
- Unwrap the cake carefully to avoid breaks
- Roll it back up with steady pressure
- Cool it in the fridge before adding chocolate topping
- Pour ganache when it's just the right thickness to cover nicely
 Pin it
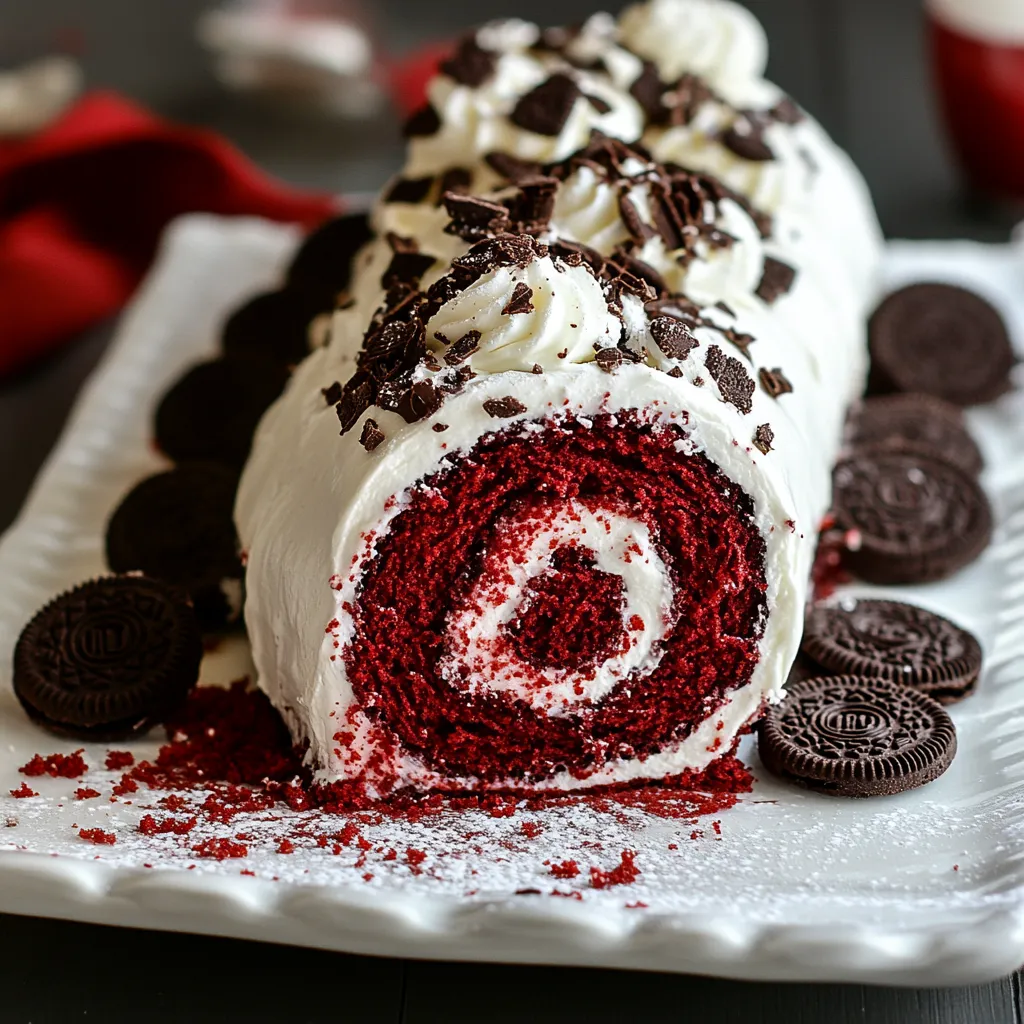
My grandma always told me that taking your time is the real secret to a perfect cake roll. She wasn't kidding - rushing through any part can cause cracks or a messy roll. I've learned that being patient, especially during that first hot rolling step, really makes the cake look amazing in the end.
More Fun Facts:
Red velvet and Oreos might seem like a new combo, but they both come from classic American dessert traditions. My family loves this version because it's like having a fancy Swiss roll and your favorite cookies in one treat. The first time my nephew had it, he looked up with chocolate on his face and said it was the "best cake ever" - pretty high praise from a kid who usually turns his nose up at desserts!
I've made tons of cake rolls over the years, but this red velvet one still tops my list. It somehow manages to look really fancy while tasting like everyone's favorite comfort foods, making it great for everything from Christmas dinner to summer birthday parties.
 Pin it
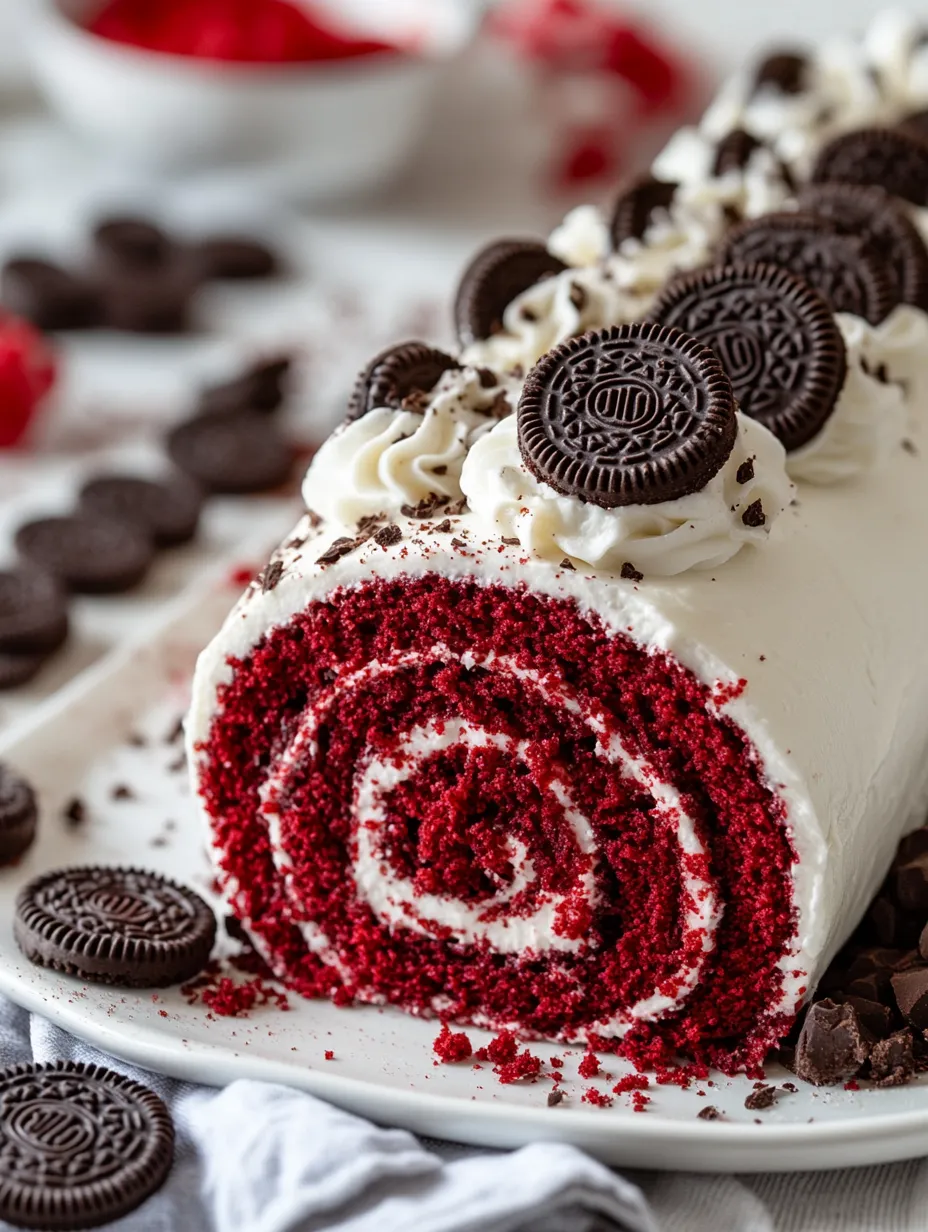
Holiday Decoration Ideas:
You can easily dress up this cake roll for different times of year. For Christmas, mix in some mint Oreos and top with crushed candy canes. During Halloween, drizzle some orange-colored white chocolate and use black Oreos. In springtime, top it with some pretty edible flowers and white chocolate curls. The basic cake works for any holiday - just change the extras.
Why Your Cake Roll Works:
Getting a cake roll right comes down to texture. If it's too dry, you'll get cracks. Too wet, and it'll stick to everything. The oil and buttermilk in this cake make it just right for rolling. When you beat the eggs until they're really fluffy, they create a cake that's both strong and bendy. That's why it's so important to whip those eggs until they turn pale and thick.
Plan-Ahead Tips:
This cake actually tastes better when you make it a day early. The flavors mix together nicely, and the filling sets up perfectly. You can make the whole roll without the chocolate coating up to two days ahead and keep it wrapped up in your fridge. Just add the ganache topping within a day of serving so it looks fresh and shiny.
Fixing Common Problems:
Got cracks in your cake? Don't worry. Small ones can be covered up with extra filling, and bigger cracks will disappear under the ganache. If your chocolate coating seems too thick, warm it up in the microwave for 5 seconds at a time. Too runny? Just let it sit on the counter, giving it a stir now and then until it thickens up.
Ways To Serve It:
Cut each slice with a warm, sharp knife for a clean edge. Stand each piece on its side to show off the swirl pattern. A light sprinkle of powdered sugar or a fresh raspberry on top makes it look extra nice. For fancy occasions, serve it with a scoop of real vanilla ice cream or some freshly whipped cream.
 Pin it
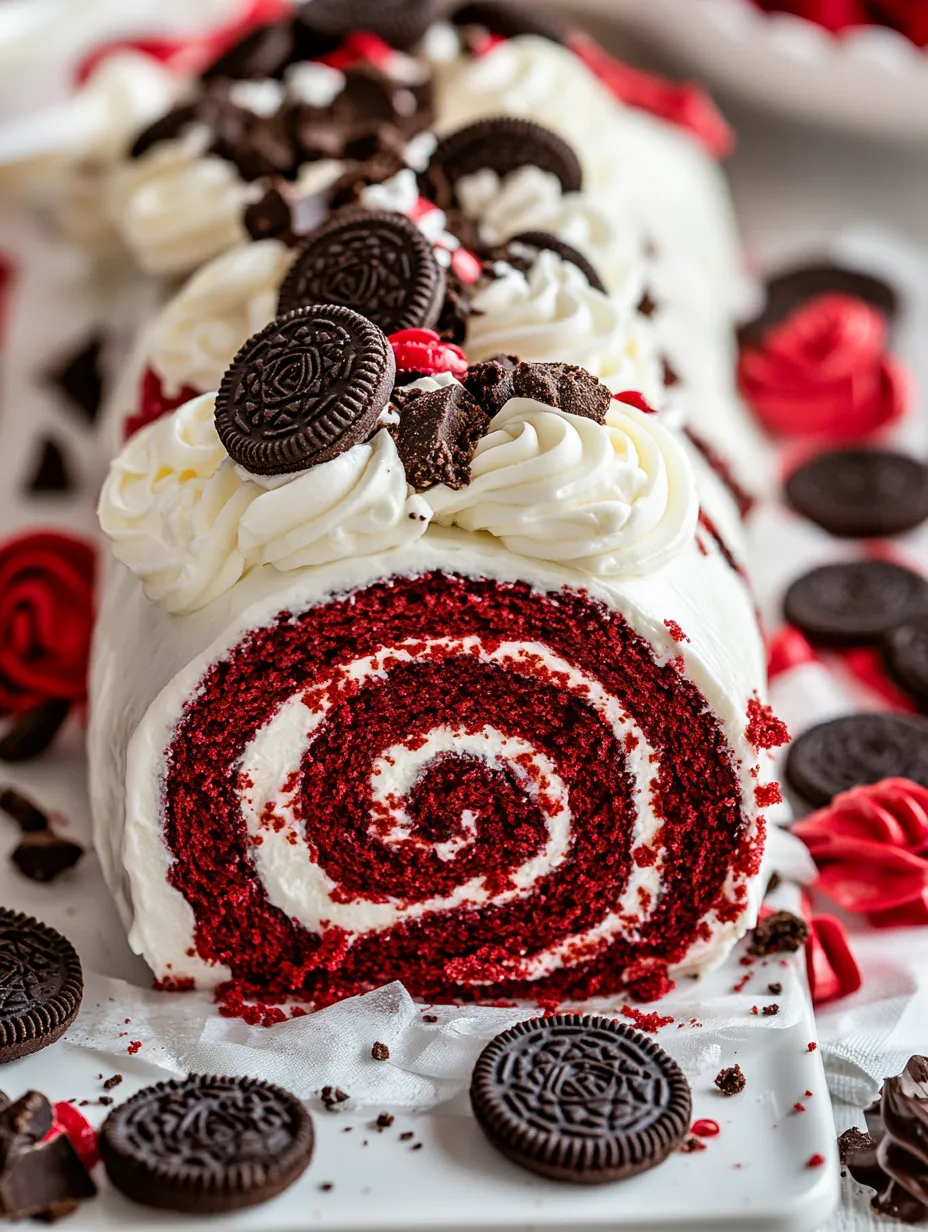
How To Store It:
Keep your cake roll in a covered container in the fridge. If you need to keep it longer than three days, wrap individual slices in plastic wrap and pop them in the freezer. Thaw frozen slices in the fridge overnight for the best texture. Don't let them thaw on the counter - the filling will get too soft and messy.
Try Different Flavors:
The classic Oreo filling is great, but you can play around with other cookie types too. Mint Oreos give it a cool, fresh taste, while golden Oreos make for a more subtle flavor. Some of my relatives like it better with chocolate cream cheese filling instead of vanilla - it really brings out the red velvet flavor.
Cutting Perfect Slices:
To get those picture-perfect slices, temperature matters. The cake should be cold but not frozen. Use a big, sharp knife dipped in hot water and wiped dry between cuts. Cut straight down in one smooth move instead of sawing back and forth.
The Final Touch:
A smooth ganache coating turns this homemade treat into something that looks store-bought. Getting the temperature right is crucial - both the cake and the chocolate need to be just right. The ganache should pour easily but not be so hot that it runs right off the cake. Try a small test drizzle on the edge of your bowl or a piece of parchment paper before covering the whole cake. A well-done ganache layer not only looks fancy but also locks in moisture to keep your cake fresh.
After baking for many years, I can tell you this Red Velvet Oreo Cake Roll never fails to get compliments. It mixes the childhood joy of Oreos with the grown-up look of a fancy cake roll. Whether you're making it for Christmas, a birthday, or just because it's Tuesday, I bet it'll become one of your go-to recipes.
Frequently Asked Questions
- → Can this dessert be prepped early?
- Absolutely! This cake keeps well in the fridge for up to 3 days, and the flavors get even better.
- → Why did cracks form in my roll?
- Make sure to roll the cake while it's still hot. Don’t worry if it cracks a little—the filling and ganache will hide it.
- → Is freezing this dessert possible?
- Yes, freeze it for up to 2 months. Wrap it tightly in plastic wrap and let it defrost in the fridge overnight.
- → Is red food dye necessary?
- Nope! The red coloring is just for looks. Skip it if you prefer—the flavor stays the same.
- → Can I swap Oreos for something else?
- Sure! You can use any cream-filled cookies to change up the taste.