
 Pin it
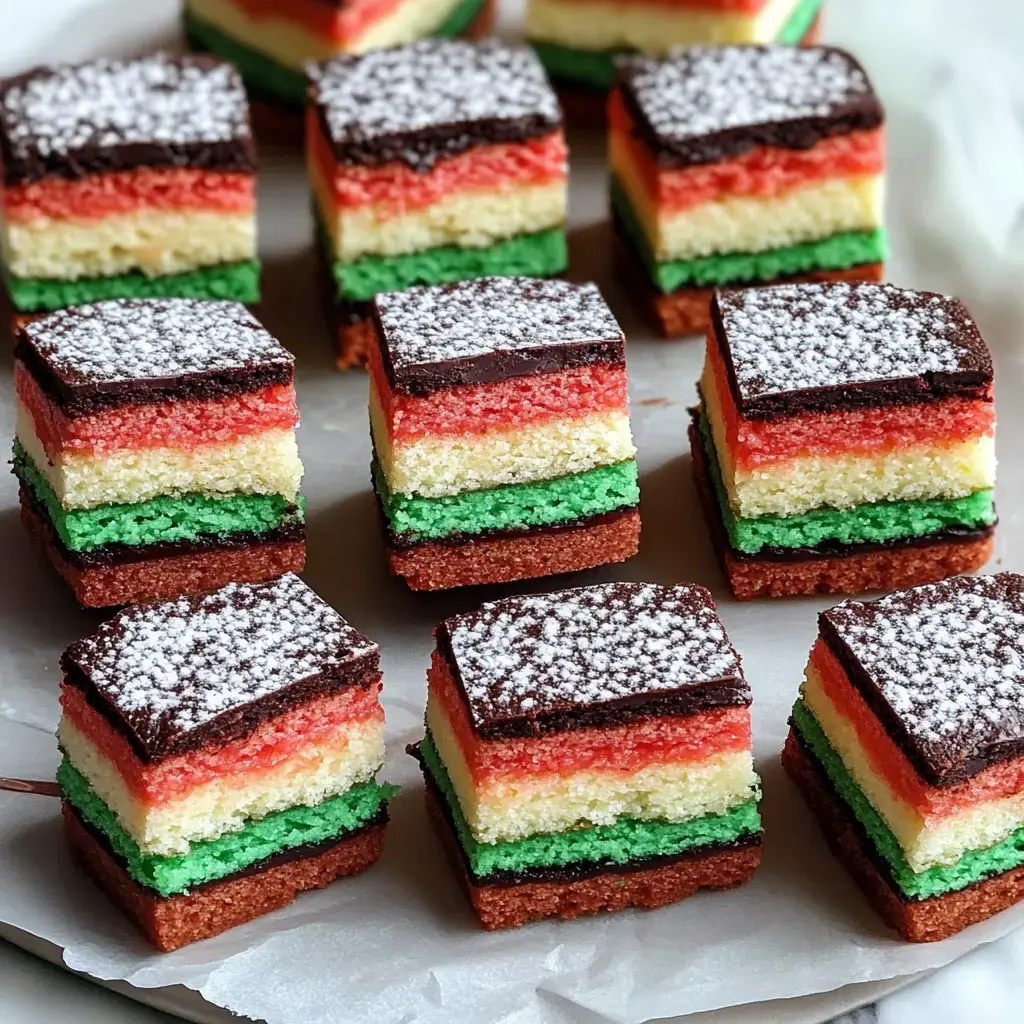
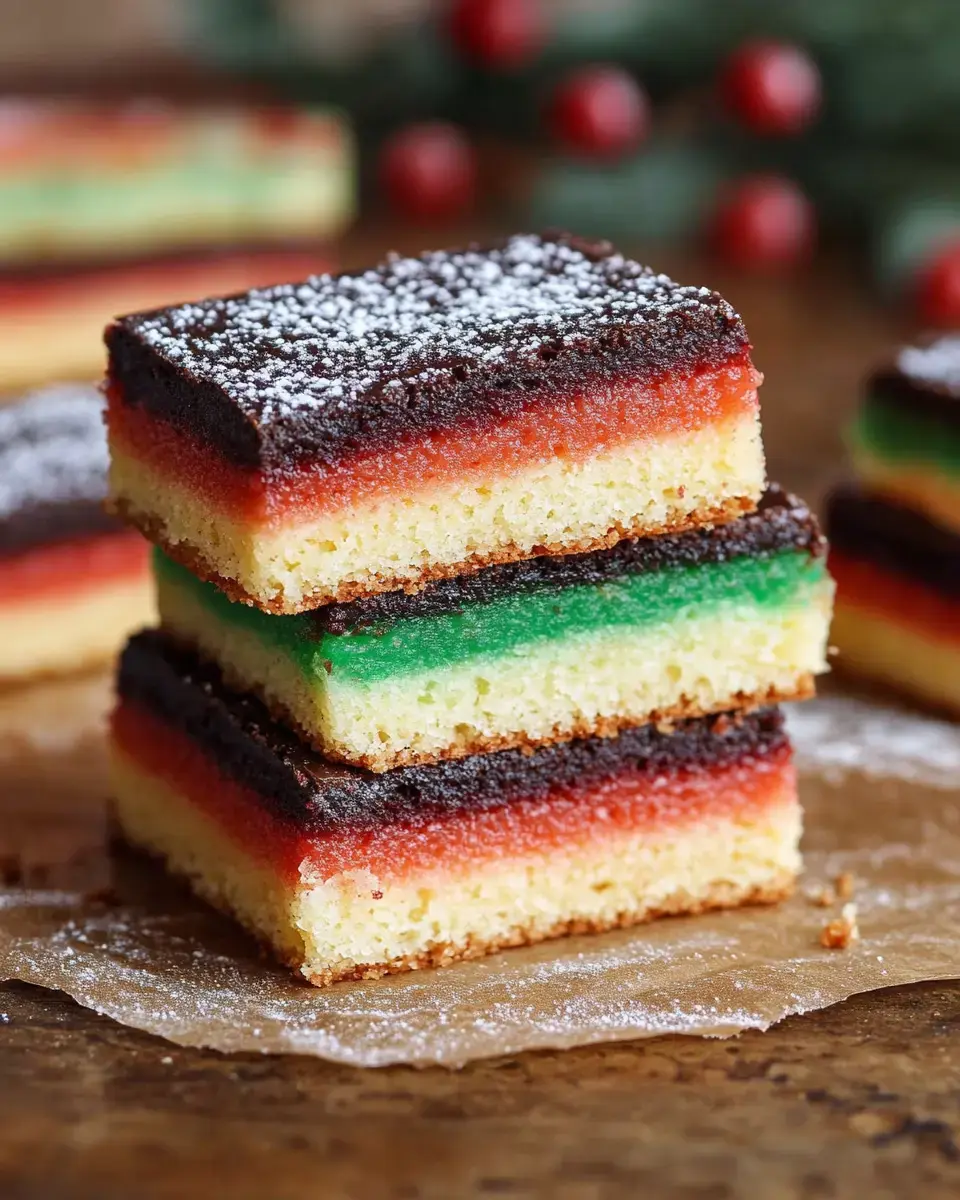
Tri-Color Almond Delights
I'm excited to pass down our cherished family tradition for these layered tri-color almond delights. During festive seasons, my home transforms into a cookie-making haven for these gorgeous stacked treats. They need a bit of patience, but trust me, this straightforward method delivers incredibly tasty cookies with delightful almond notes, soft textured layers, and the perfect chocolate topping. After trying this homemade version, you'll find store-bought ones just don't measure up.
What Makes These Cookies Special
You'll fall in love with these wonderful homemade treats because:
- They're even tastier than authentic bakery versions
- The straightforward stacking technique creates gorgeous holiday cookies
- You've got freedom to switch up the jam and chocolate types
- The batch is generous enough for gatherings (if you can stop munching them)
Simple Components You'll Need
- Eggs: Split them with care, as those whites will create our airy, light texture.
- Almond Paste: The heart of the authentic flavor - it's absolutely necessary.
- Granulated Sugar: Gives us that wonderful soft, cake-like feel.
- Margarine or Butter: Both do the job nicely, pick whatever's handy.
- All-Purpose Flour: Standard flour works perfectly for this straightforward method.
- Food Coloring: Try to find gel versions for more intense, vibrant shades.
- Raspberry or Apricot Jam: Go with your preference, they're both fantastic options.
- Bittersweet Chocolate: Quality matters here - it'll show in your final results.
Clear Instructions From Start to Finish
- Make Your Base Mixture
- First, whip those egg whites till they're fluffy with gentle peaks. In another bowl, beat the almond paste until it's completely smooth with no lumps. Mix in your butter until it becomes light and creamy. Add egg yolks one by one, then pour in that splash of almond extract for that unforgettable flavor. The last step is carefully folding in your whipped egg whites - they're the secret to our fluffy layers.
- Add Your Vibrant Hues
- Grab three separate bowls and split your batter evenly between them - a kitchen scale comes in handy here. Now for the fun bit - add red dye to one bowl, green to another, and leave the last one natural. Take your time mixing until you've got uniform, bright colors. Spread each colored batter into its own lined pan, making sure it's smooth and reaches all edges.
- Careful Oven Time
- Keep a close eye on these thin layers - they need just 8-10 minutes. They're ready when they barely bounce back when touched lightly. Don't let them turn golden - we want those bright colors to shine through. Let them cool completely on racks before moving forward.
- Putting It All Together
- Now comes the assembly stage. Put your green layer down first, spread a thin jam coating on top. Place the white layer next, add more jam, then top with the red layer. Wrap everything tightly in plastic and here's the crucial part - place a heavy baking sheet on top and leave it overnight. This pressure bonds those layers perfectly.
- Finishing With Chocolate
- Gently melt your chocolate until it's smooth and glossy. Pour half on top, spread it to the edges, then chill until set. Turn everything over and coat the other side too. Once fully set, trim the edges for a neat finish, then slice into small rectangles.
- Adding The Final Touches
- Wipe your knife between cuts for the cleanest edges. For a fancy touch, add extra chocolate drizzles or tiny gold decorations. Let the cookies warm up to room temperature before serving - that's when their flavors really shine.
Smart Tricks For Great Results
- Almond Paste Check: Make sure it's not dried out or old, as fresh paste blends much better.
- Equal Portions: Using a scale for your batter means perfectly balanced layers every time.
- Don't Rush: The overnight chilling step isn't optional - it's what bonds everything together.
- Neat Cutting: A good serrated knife, wiped clean between slices, gives you picture-perfect cookies.
 Pin it
Keeping Them Fresh
Store your colorful treats in the fridge in a sealed container and they'll stay tasty for up to a week. Planning ahead? These cookies freeze wonderfully for up to three months - just move them to the fridge the night before you need them.
Impressive Yet Achievable Treats
These colorful layered almond cookies bring so much happiness both in making and sharing them. They're stunning on Christmas platters, at fancy gatherings, or anytime you want to create something memorable. Once you get the hang of this method, you'll find yourself whipping them up for countless occasions, just like I always do.
Frequently Asked Questions
- → Why measure batter amounts?
To get evenly thick layers that stack neatly and look good.
- → Why not fully bake layers?
So the cakes stay soft and don't dry out when put together.
- → Why refrigerate before slicing?
It keeps the shapes clean and holds the layers in place.
- → Can these be stored in the freezer?
Definitely. Seal in an airtight container, and they'll keep for up to 3 months.
- → What's the point of warming the jam?
It makes spreading smoother and ensures thinner, even layers.