
 Pin it
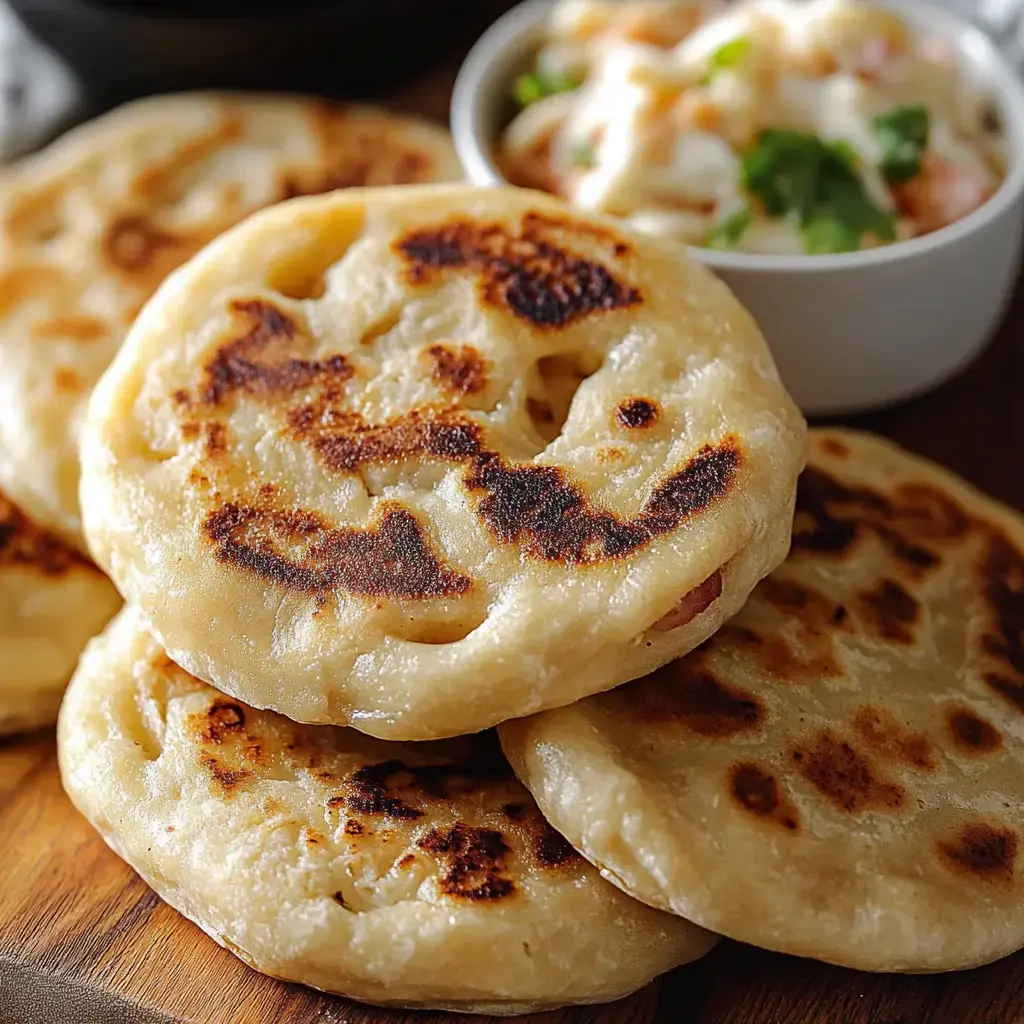
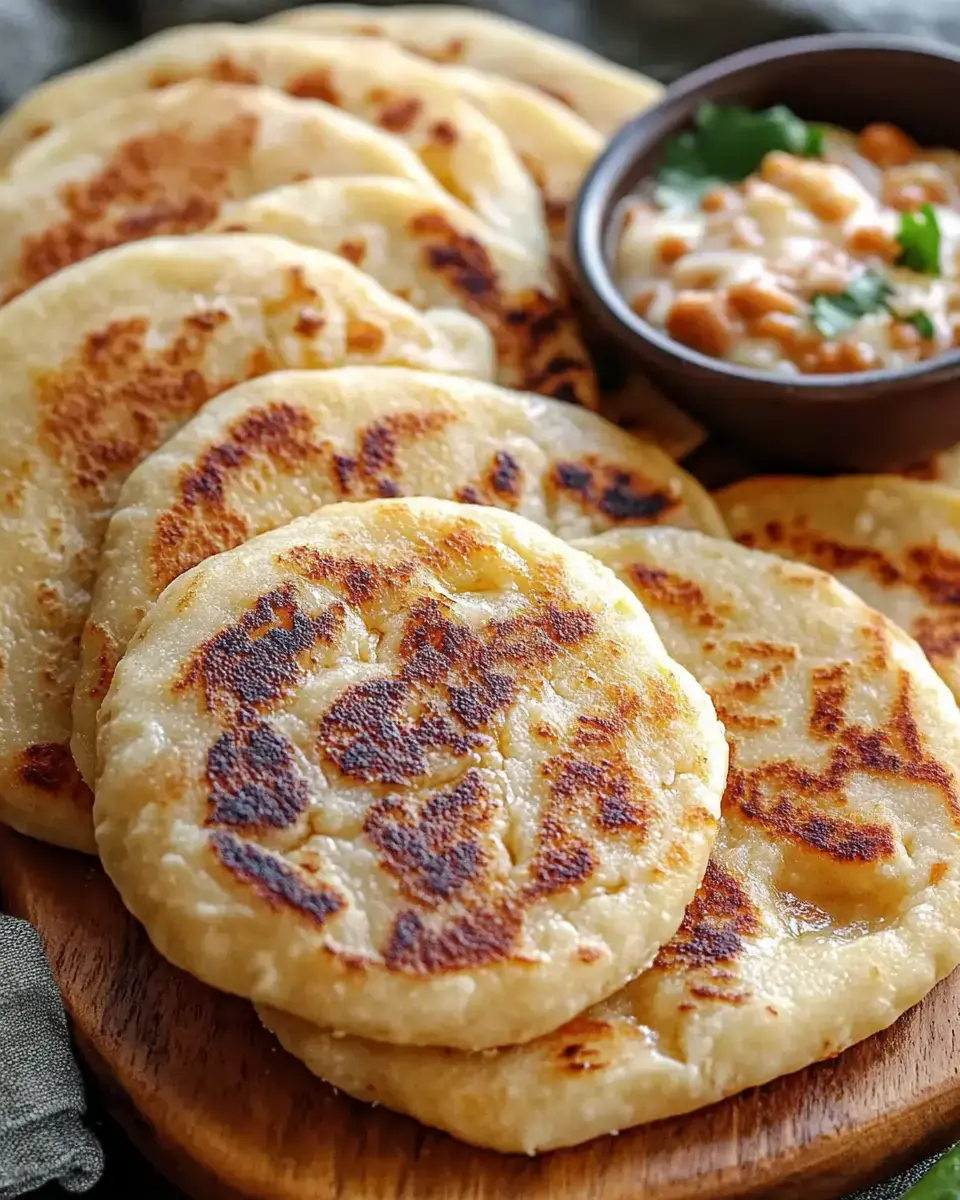
Gotta share about these incredible handcrafted pupusas that completely switched up my comfort food game! I first figured out how to make these in my buddy Maria's home, where her grandma gently taught me how to create that sweet spot of gooey cheese tucked inside tender corn dough. After loads of weird-shaped tries (and way too many cheese bursts!), I've now nailed this simple method that brings genuine Salvadoran tastes straight into your home.
What Makes This Recipe Special
The wonder of these handmade treats is how they transform simple kitchen staples into something extraordinary. You've probably got most stuff already - just need some masa harina and cheese and you're almost ready! I adore how adaptable this simple method is. I'll stick with classic cheese and beans sometimes, other days I'll play around with whatever's hanging in my fridge. They come out yummy every time. There's that magic about everyone in the kitchen, crafting these together. My little ones enjoy helping shape them, even when they look a bit funny!
Ingredients
- For the Dough:
- 2 cups masa harina (Maseca works best)
- 1 1/4 cups hot water
- 1/2 teaspoon sea salt
- For the Filling:
- 1 cup shredded mozzarella
- 1/2 cup warm refried beans
- 1/2 cup cooked pork (if you want)
- For Cooking:
- 2 tablespoons vegetable oil
- Small bowl of warm water
- Extra oil for hands
- Equipment Needed:
- Large mixing bowl
- Cast iron griddle or skillet
- Clean kitchen towel
- Plastic wrap or zip bag
Creating Your Own Pupusas
- Putting Together Your Dough
- Blend your masa harina with salt to start, then gradually pour in hot water while working the mix with your hands. You want it feeling like playdough consistency firm but not sticky. If it seems too crumbly, add water one tablespoon at a time. Cover it with a warm, damp towel to rest.
- Forming Them Right
- This is the fun part! Shape your hand like you're holding water, put a golf ball sized dough in it, and push it into a small bowl shape. Drop in your filling about a tablespoon then fold the edges up and over. Gently flatten it between your palms.
- Cooking Them Just Right
- Your griddle or skillet should be medium hot a tiny splash of water should sizzle across the top. Let each pupusa cook around 3 minutes per side, until golden brown spots appear. Don't rush the flip let that crust really form!
Kitchen Wisdom I've Learned
Trust me, we all mess up while figuring things out! When your pupusas split open, your dough needs more moisture just mix in a bit more warm water. If cheese escapes, you probably stuffed them too full (done that so many times!) or didn't close the edges properly. Keep your heat at medium too hot and they'll char before the inside melts, too low and they'll turn tough.
 Pin it
Enjoying Your Tasty Creation
At my place, we build a small pupusa station! I set out containers of curtido (that zesty cabbage mix), some red salsa, and cut avocados. I often prepare extra curtido a few days before it actually tastes better after sitting awhile. Don't miss out on the curtido that crispness against the soft, melty pupusa is just amazing!
Storing and Warming Up
Pupusas taste best right off the hot griddle, but I usually make spare ones for fast meals later on. They'll stay good in the fridge for a couple days just warm them in a dry pan to make them crispy again. You can even freeze them uncooked! Just place them flat on a baking sheet until solid, then transfer to a freezer bag. Cook them directly from frozen, giving them a few more minutes on each side.
Frequently Asked Questions
- → Why's my dough cracking?
It’s likely too dry. Wet your hands as you work and include extra water to get a smoother texture. It should feel soft and pliable like play-dough.
- → Can I prep dough early?
Not really. These are best mixed and cooked right after. The dough dries up fast and becomes hard to shape.
- → What to do about filling leaks?
Filling spilling is common. Next time, use a bit less filling and press the edges tightly. Don’t worry, the crispy bits are extra delicious!
- → How do I know when to flip them?
Let a golden crust form, which takes around 3 minutes. Flip only after or they’ll stick to the pan.
- → What’s the perfect cheese choice?
Oaxaca cheese is most traditional, but mozzarella melts beautifully too. Aim for something stretchy when hot.
Conclusion
Hand-formed Salvadoran pupusas are golden-cooked corn dough filled with cheesy delight and savory fillings. A simple, hearty dish everyone can enjoy!