
 Pin it
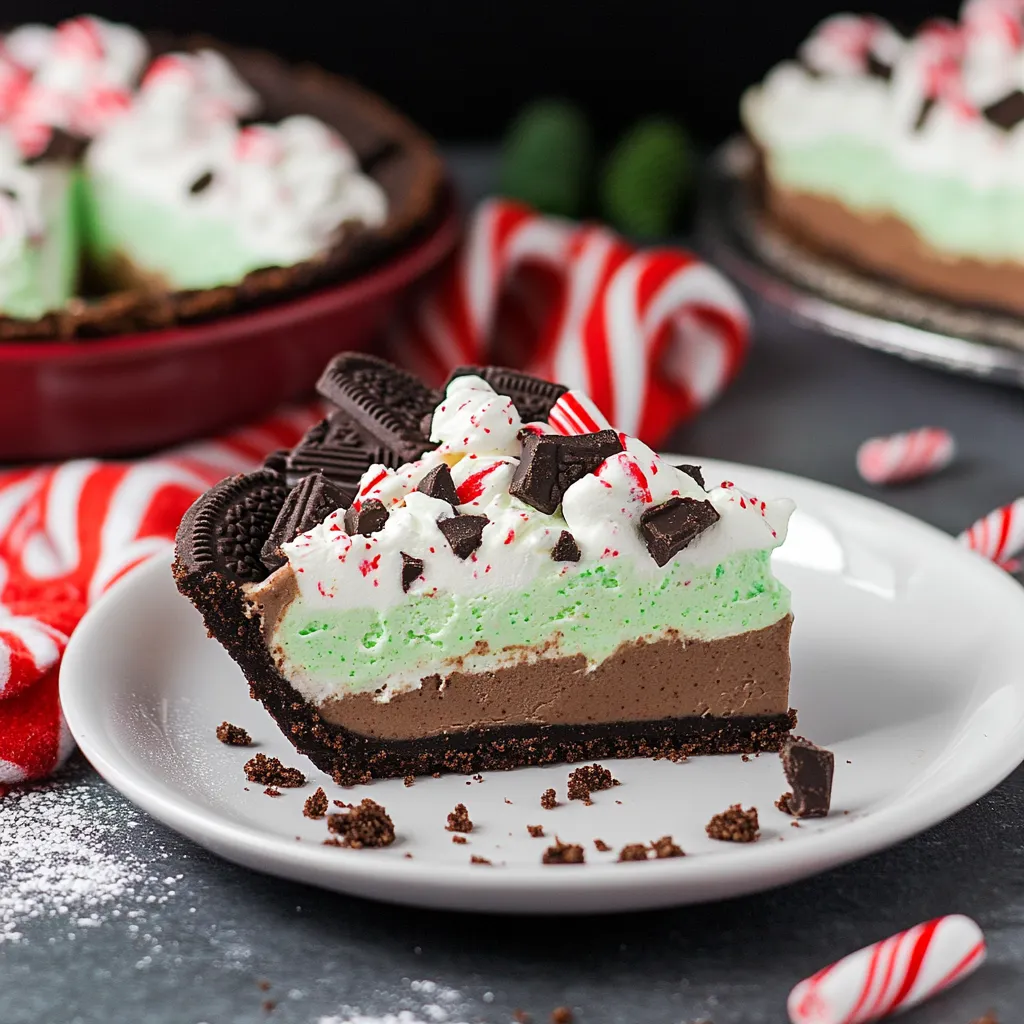
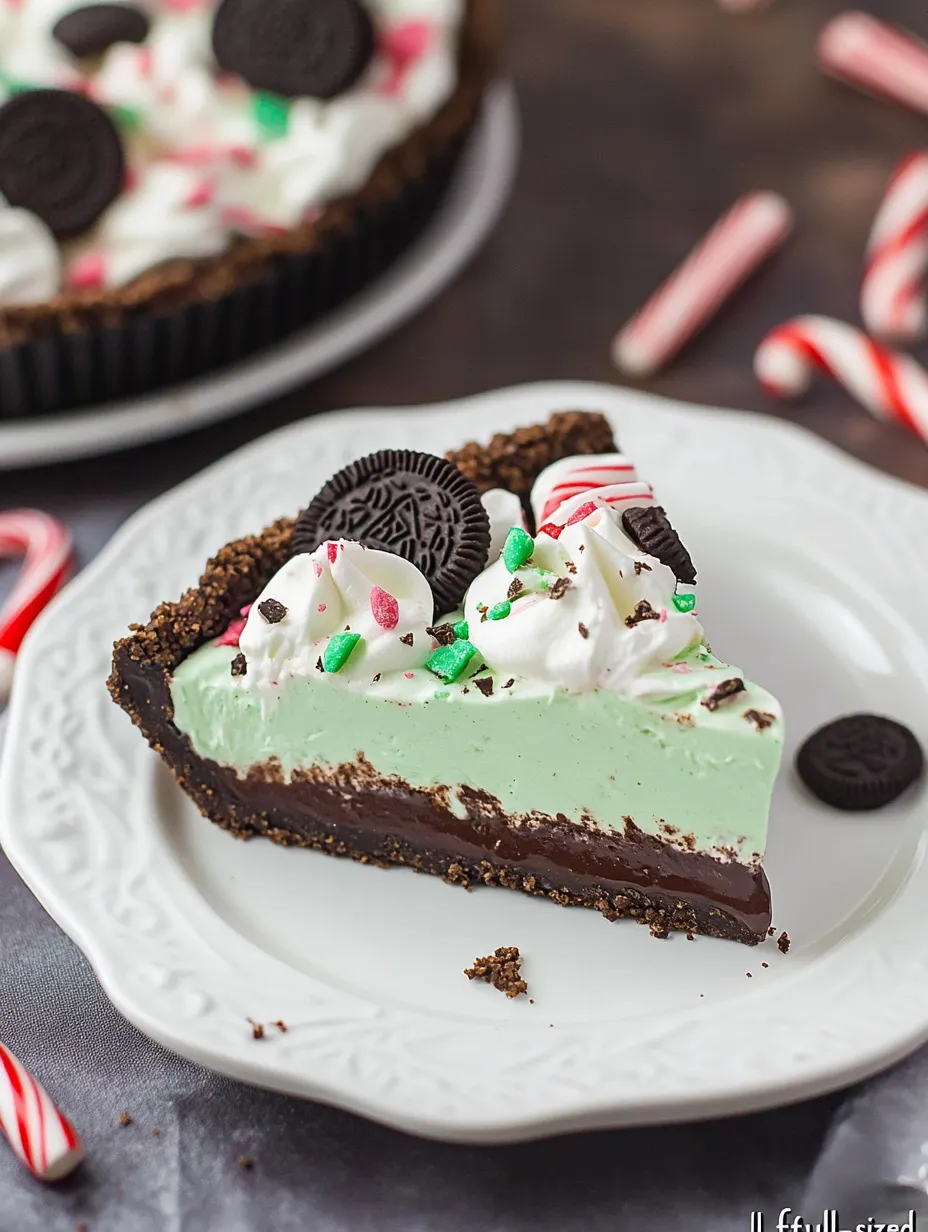
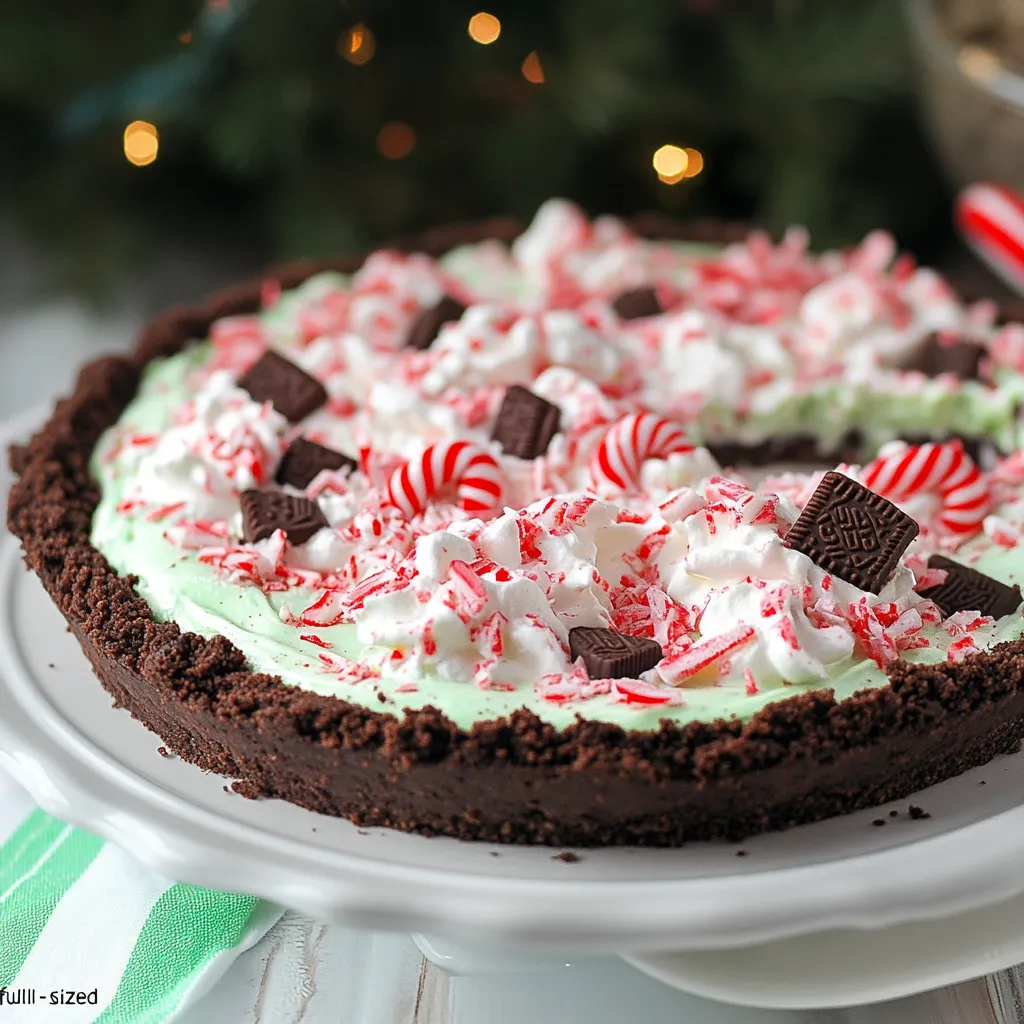
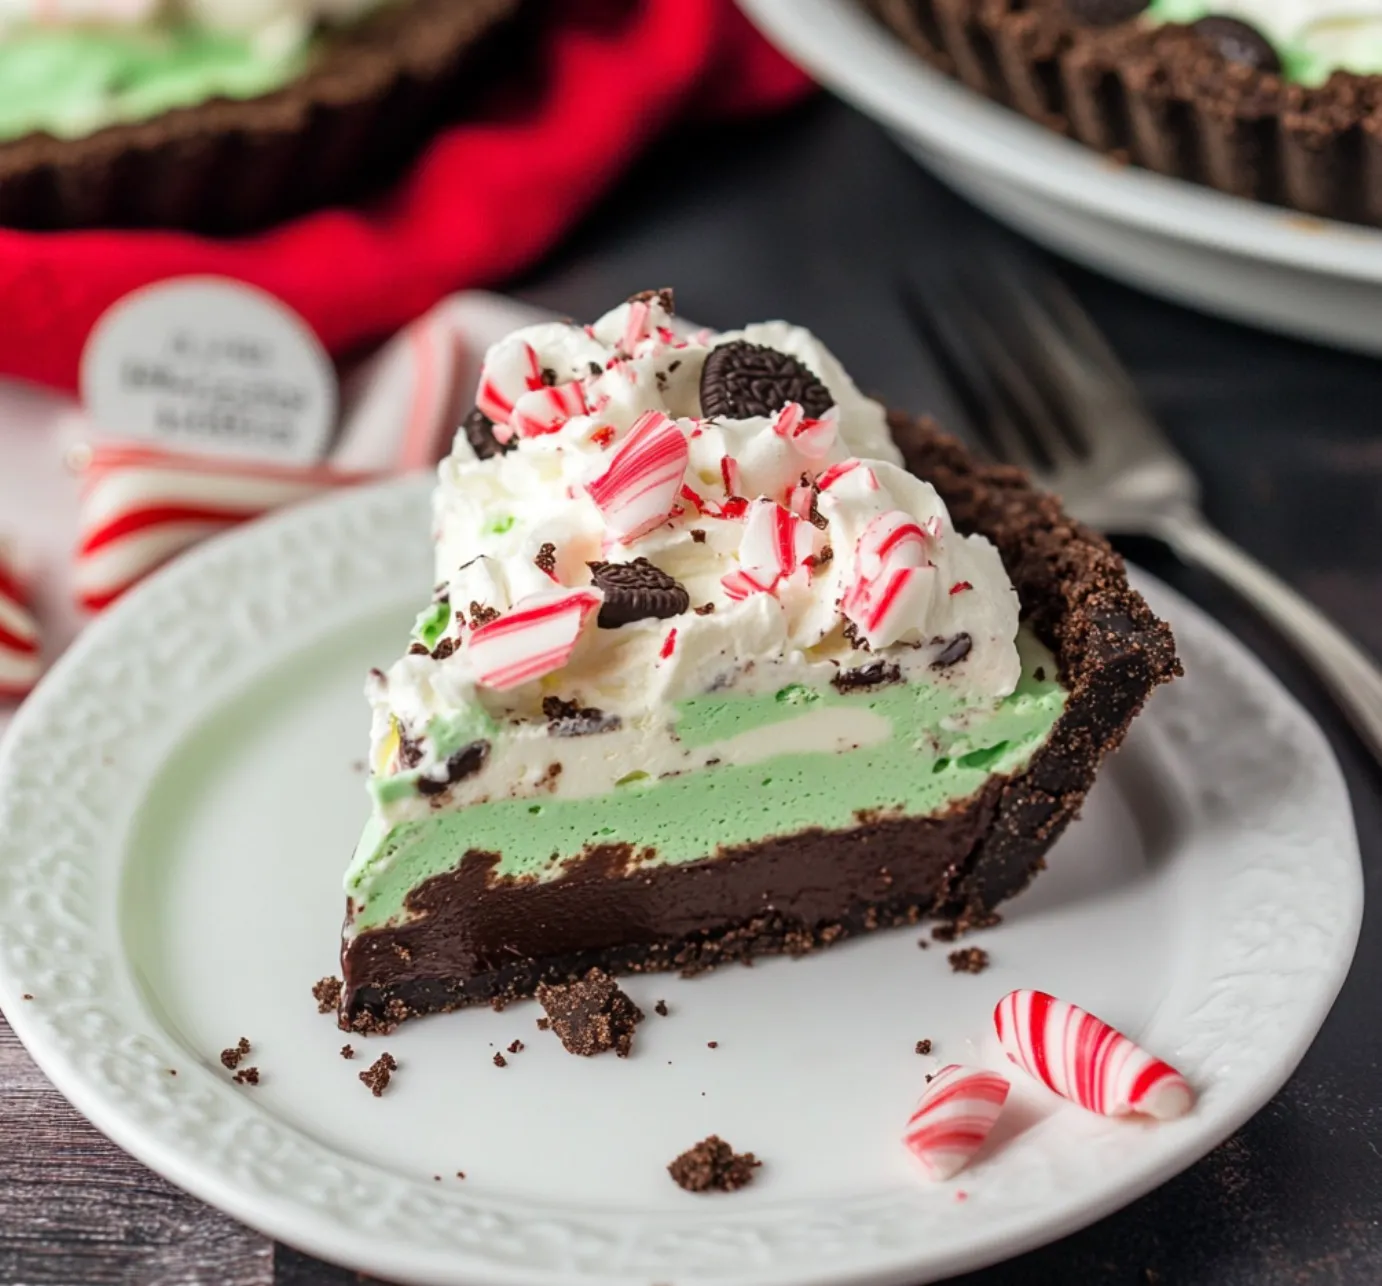
Chill out with this no-bake Mint Chocolate delight that's got holiday written all over it. The dreamy combo of deep chocolate and cool mint, plus that crunchy Oreo base, makes simple stuff turn into something amazing—no hot oven needed! The magic happens when smooth filling meets crisp crust for a showstopper dessert.
This pie became the talk of our family get-togethers last holiday season. Even my fussy nephew, who usually turns his nose up at minty sweets, grabbed another slice and later asked for it at his birthday party.
Key Ingredients and Smart Picking
- Oreo cookies: Go with original ones, not Double Stuf, to get the crust just right. They make the perfect chocolatey foundation
- Frozen whipped topping: Don't rush the thawing—let it melt slowly in your fridge for the best results. Quick thaws can mess up your filling
- Hershey's chocolate bars: They melt exactly how we need them to. Swap in dark chocolate if you want something less sweet
- Peppermint extract: Spring for the real stuff, not fake flavoring, to avoid that weird chemical taste some mints have
- Candy canes: Stick with old-school peppermint ones instead of fancy flavors for that classic minty punch
 Pin it
Step-by-Step Walkthrough
- Crushing Oreos:
- First, smash those Oreos into tiny bits. Toss them in a zip bag and go at it with your rolling pin from the middle outward so you don't tear the bag. You're after even-sized crumbs for a solid crust.
- Making the Crust:
- Mix your Oreo dust with melted butter until it looks like damp sand. Pack it firmly into your pie dish, getting an even layer that climbs up the sides too. The bottom of a measuring cup works wonders for this job.
- Creating the Chocolate Layer:
- For the chocolate part, slowly melt those Hershey bars in your microwave, stopping every 30 seconds to stir. Let it cool for 5 minutes so it won't deflate your whipped topping when mixed.
- Making the Mint Layer:
- Split your thawed topping between two bowls. Gently fold melted chocolate into one half using light, swooping movements to keep it fluffy. Don't go crazy mixing or it'll flatten out. In bowl two, drop in some peppermint extract and green food coloring if you want. Start with just a little extract—you can always add more.
 Pin it
My grandma always claimed mint helps you digest food, which might explain why this pie feels lighter than other holiday sweets. When I was little, she'd serve thin slivers of minty chocolate treats after big meals, saying they were "good for your tummy."
Taking It Further
What's great about this pie is how easily you can switch things up. That Oreo base works so well with all kinds of chocolate. I've made it with dark chocolate for grown-up gatherings, and white chocolate for a cool contrast against the green mint layer.
The pie actually gets better as it sits, with the crust softening just enough while still holding its shape. You end up with something almost like a truffle that makes every bite better than the last.
For fancy occasions, I've topped it with chocolate curls made by running a veggie peeler down a slightly warm chocolate bar. Looks impressive but takes almost no effort.
After trying countless versions at family gatherings, this pie has become our holiday must-have. It might look simple, but it's the dessert that makes people stop mid-conversation to ask how you made it.
Drinks That Go Great With It
Sure, store-bought hot cocoa works fine with this pie, but I've found a strong cup of dark coffee creates an amazing flavor match. The coffee's bitter notes balance out the sweetness while making the chocolate taste even better. When friends come over, I love setting up a small coffee station next to this dessert.
How The Texture Changes
One cool thing about this pie is how it transforms during storage. Those creamy layers slowly mingle with the crust, creating something almost like ganache around the edges. This change makes leftover slices just as good as—maybe even better than—the first serving.
Do-Ahead Wonder
This pie isn't just easy because it skips the oven. I've found making it a day before actually improves everything about it. The mint flavor spreads through all the layers, and everything sets to just the right slicing texture. That makes it perfect when you've got a million other things to prep for your party.
Year-Round Options
Though it's perfect for winter holidays, you can easily tweak this pie for any time of year:
- Skip the candy canes and use chocolate curls for springtime
- Top with real mint leaves during summer months
- Try seasonal Oreo flavors for fall celebrations
- Add a white chocolate drizzle for winter parties
Your first taste might remind you of those fancy after-dinner mints, but way better. The mix of smooth, creamy filling with that crunchy crust and toppings makes a texture adventure that'll have you reaching for seconds.
Freezing Know-How
When saving slices for later, wrap each piece in plastic wrap first, then aluminum foil. This double protection keeps freezer burn away and locks in all those delicate flavors. Let frozen slices thaw overnight in your fridge for the best texture comeback.
This no-bake mint chocolate pie has grown beyond just another recipe in my collection—it's now my go-to crowd-pleaser that combines childhood flavor memories with fancy presentation that works for any holiday table. Whether you're a kitchen pro or just starting out, this dessert shows that sometimes the easiest recipes create the most memorable moments.
Fun Serving Ideas
Turn dessert into a hands-on experience by creating a topping station. Set out small bowls with smashed candy canes, chocolate shavings, whipped cream, and mint leaves. Let everyone jazz up their own slice, adding fun to your dessert round. At family parties, this always gets people talking and creates sweet memories around the table.
Getting The Temperature Just Right
This pie really shines when served at the perfect temperature. While it needs fridge storage, letting it sit out for 12-15 minutes before eating makes a huge difference. The chocolate softens slightly, the mint flavor opens up, and everything comes together just right.
Other Crust Ideas
The Oreo base is classic, but feel free to play around:
- Graham crackers mixed with a bit of cocoa powder
- Chocolate wafers for an extra-dark foundation
- Mint Oreos for a double-mint kick
- Chocolate graham crackers for something a bit lighter
Each option brings its own personality while keeping that essential mint-chocolate magic.
 Pin it
Fixing Common Problems
Knowing what might go wrong helps you nail it every time:
- Grainy filling usually means your chocolate was too hot when you mixed it in
- If the filling won't firm up, it probably needs more time in the fridge
- A crust that falls apart likely needs more butter
- Fix uneven layers by gently smoothing with a flat spatula
I first came up with this recipe during a holiday crisis when my oven quit working in mid-December. What started as a backup plan has turned into the treat everyone expects me to bring to gatherings. It's so simple to make but looks fancy enough for special occasions, making it perfect for both casual family dinners and formal holiday parties.
This no-bake mint chocolate pie shows what I love most about cooking—how basic ingredients, handled with care, can turn into something truly special. It proves that amazing desserts don't always need fancy techniques or weird tools, just a solid recipe and a bit of patience.
These tricks come from making this pie countless times, learning something new with each batch. The best part is how it'll become your own creation as you adjust little things based on what you and your family enjoy most.
Frequently Asked Questions
- → Can this dessert be prepped early?
- Yep! You can make it 2 days ahead and keep it covered in the fridge.
- → Is freezing this treat possible?
- Sure, freeze it up to 2 months. Let it thaw in the fridge overnight.
- → What can I use if I don't have candy canes?
- Go for peppermint candies or just skip them for a non-holiday version.
- → Can I swap milk chocolate for dark chocolate?
- Absolutely. Use a dark chocolate bar if you prefer a deeper flavor.
- → How long does it stay fresh in the fridge?
- It'll last up to 5 days when stored tightly covered.