
 Pin it
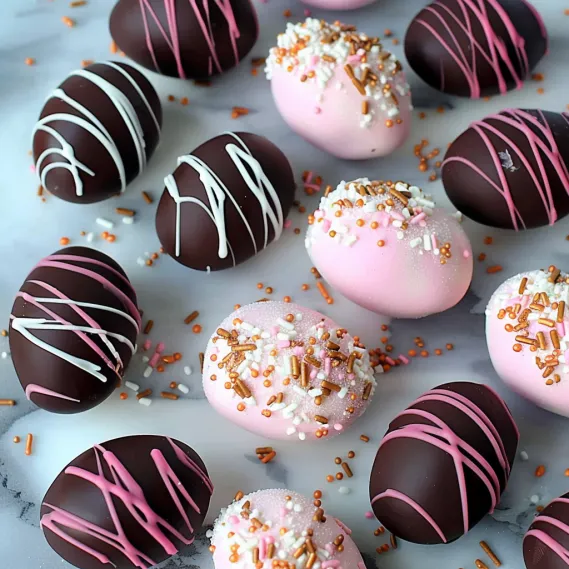
Taking a bite of a handmade marshmallow Easter egg wrapped in creamy chocolate feels absolutely enchanting. When that fluffy, light marshmallow meets the crisp chocolate shell, you've got yourself a treat that makes regular Easter basket stuff look boring. I wasn't sure these eggs would be worth the trouble when I first tried making them. Boy, was I wrong! These billowy treats are nothing like what you'd buy at the store - they're super soft, cloud-like, and have this amazing fresh vanilla taste you can't help but love.
Last Easter was the first time my kids and I whipped these up together. Their jaws dropped watching basic ingredients turn into something so wonderful. Even my little one, who usually runs from messy stuff, couldn't wait to get his hands in once he saw we were basically playing with fluffy edible clouds. My teenage daughter tries so hard to act unimpressed by everything, but even she jumped right in - especially when it came time for the chocolate dipping part.
Key Components and Shopping Guidance
- Unflavored Gelatin: Grab Knox brand from your grocery store's baking section, typically in small packages with four envelopes inside. You'll get about 2.5 teaspoons per envelope
- Granulated Sugar: Standard white sugar gives just the right sweetness and feel. Skip using sugar substitutes here as they'll mess with how your marshmallows turn out
- Light Corn Syrup: This stops sugar crystals from forming while cooking, giving you that classic marshmallow feel. Don't stress - your finished treats won't taste like the syrup at all
- High-Quality Chocolate: This is worth spending extra on - try Ghirardelli bittersweet or semisweet baking bars. Better chocolate means more amazing eggs
The real champion in this whole thing is definitely the fresh marshmallow. The first time I tasted homemade marshmallow after making these, I kicked myself for waiting so long to try it. The texture is just unmatched - it's like eating a sweetened puff of air with gentle hints of vanilla throughout.
Step-by-Step Making Process
- Step 1: Shape Your Egg Forms
- Pour all-purpose flour into a 9x13-inch dish and flatten the top with a spoon or straight-edged spatula. Push a plastic Easter egg halfway down into the flour to make perfect egg-shaped dents, keeping them about an inch apart so they're easy to remove later. If flour sticks to your hands, sprinkle them with powdered sugar during the shaping.
- Step 2: Mix and Heat Your Sugar Combo
- Pour gelatin over cold water in your stand mixer bowl and let it sit while you work on other things. Mix sugar, corn syrup, salt and water in a pan and warm it up without stirring until it hits exactly 240°F (soft-ball stage). Take it off the heat right away when it reaches this point so the sugar doesn't burn.
- Step 3: Beat Your Marshmallow Mix
- Start your mixer on low and slowly pour the hot sugar mix into the gelatin in one continuous stream. Turn the speed up gradually to high and keep beating for 12-15 minutes until everything gets thick, white, and grows three times bigger. Add some vanilla during the last minute for the best flavor base.
- Step 4: Fill Your Molds and Wait
- Scoop the marshmallow stuff into a piping bag or zip-top plastic bag with a corner cut off and quickly squeeze it into your flour shapes before it starts hardening. Fill each hole completely, and smooth the tops with a wet finger if needed. Let your marshmallows sit uncovered at room temperature for at least 3 hours or overnight until they're firm.
- Step 5: Clean and Cover with Chocolate
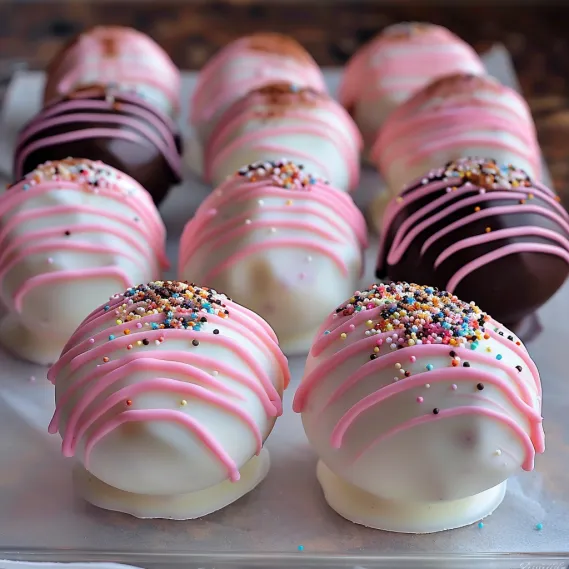
- Carefully lift the set marshmallows from the flour, brush off the extra with a soft baking brush, then coat them with a mix of cornstarch and powdered sugar. Melt good chocolate using a double boiler or microwave, then dunk each marshmallow egg completely, tap off the extra and place on parchment to harden. Stick on sprinkles or decorations while the chocolate's still wet, then wait for everything to set fully before wrapping or serving.
 Pin it
My first go at these eggs taught me a lot about taking my time and watching the clock. I hurried through the piping step and ended up with marshmallow strings all over my kitchen like festive spider webs. Now I make sure everything's ready before the marshmallow is done and I work carefully but quickly when filling the molds.
Tasty Presentation Ideas
These chocolate-dipped marshmallow eggs look fantastic in Easter baskets, but you can do so much more with them. Try putting them on a pretty platter surrounded by fake grass made from green-tinted shredded coconut. For a spring get-together breakfast, put one by each plate as a cute name holder by tying on a small tag with light-colored ribbon. They also make wonderful presents when packed in see-through bags closed with pretty ribbons.
Fun Twists on the Classic
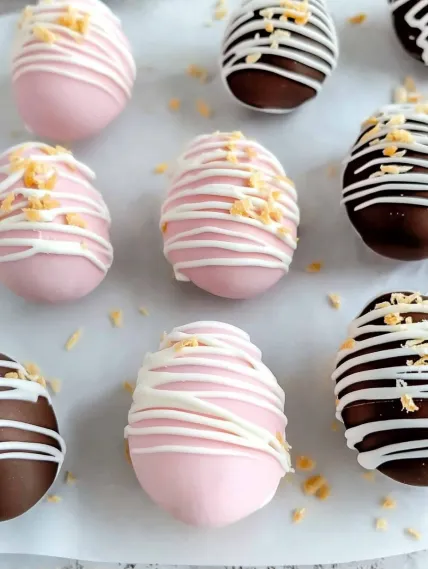
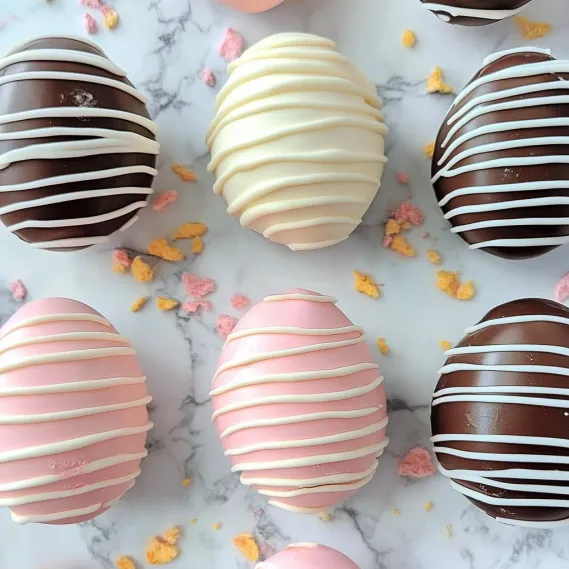
The traditional vanilla marshmallow with chocolate coating tastes amazing, but you can switch things up in tons of ways. For different flavors, try adding a couple drops of peppermint or almond flavoring to your marshmallow, or swap vanilla for strawberry or orange for fruity eggs. The chocolate layer gives you another chance to get creative - try white chocolate colored with soft food dyes, or drizzle different chocolate over the base layer. For fancy eggs, add royal icing flowers or draw patterns with colored white chocolate.
 Pin it
Keeping Your Treats Fresh
These marshmallow eggs stay good for up to two weeks when stored right. Put them in a container that seals tight with parchment paper between layers so they don't stick together. Keep them in a cool spot at room temp instead of the fridge, since cooling can make the chocolate get wet with condensation when you take them out later. For giving as gifts, wrap single eggs in clear baggies tied with pastel ribbons, or arrange several in pretty Easter boxes lined with colored tissue.
 Pin it
What started as just trying something new has turned into one of our can't-miss Easter activities. There's something really rewarding about turning basic ingredients into fancy-looking treats that make everyone smile. The making part itself becomes a fun holiday memory - flour-covered faces, sticky hands, and all. Though they might look tough to make at first glance, these homemade marshmallow Easter eggs aren't actually that hard even if you've never made candy before, and the results are totally worth the effort.
Frequently Asked Questions
- → Can I skip corn syrup in this recipe?
- Corn syrup helps keep the texture smooth and avoids crystals forming. You can replace it with honey or golden syrup, but expect subtle flavor or texture differences. Another option is a homemade invert sugar syrup, though that's more advanced. Stick to the same amount and adjust based on personal taste.
- → Do I really need a candy thermometer?
- Yep! Accurately hitting 240°F (soft ball stage) ensures marshmallows turn out the perfect consistency. Without one, you risk overcooking or undercooking the sugar. Worst case, try the cold water trick—dropping the syrup into water to test texture—but a thermometer is much more reliable.
- → Which chocolate is best for dipping?
- Chopped dark or semi-sweet chocolate (50–60% cacao) pairs well with the marshmallow’s sweetness. For easier handling, melting wafers or candy melts work beautifully. If you're just using chocolate chips or bars, blending in some coconut oil makes them smoother for dipping too.
- → How far ahead should I make these treats?
- You can prep them up to a week in advance! Store them in a completely sealed container in the fridge so the marshmallow doesn’t dry out. Before serving, let them sit at room temp for about 15 minutes for the best texture and flavor.
- → Why are there white marks on my chocolate?
- That’s ‘bloom,’ caused by untempered chocolate. To avoid it, save a small amount of chocolate to stir into the melted chocolate for quick tempering. Or, stick to candy melts—they don’t need tempering. Though bloom doesn’t ruin the flavor, storing dipped treats in the fridge minimizes streaking too.
- → Can I change up the flavors?
- Totally! Swap the vanilla for almond or coconut extract, or go bold with lemon or peppermint. Add drops of food coloring for fun colors, or mix in freeze-dried fruit powders. For a richer twist, replace water with fruit juice or strong coffee.