
 Pin it
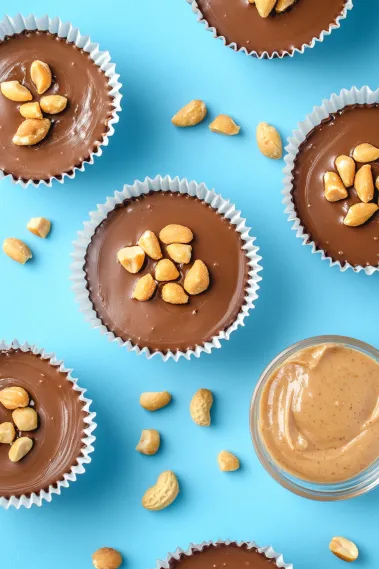
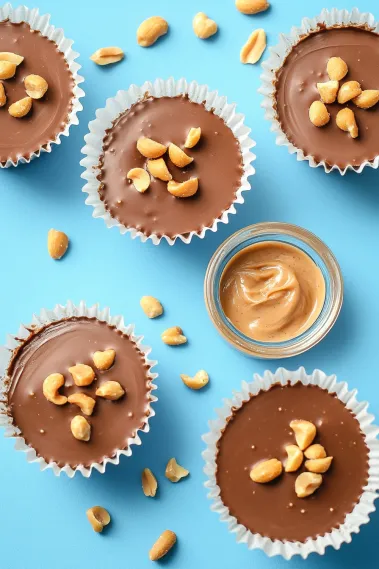
Smooth, velvety dark chocolate wraps around an ultra-creamy nut center that balances mild sweetness with a dash of sea salt. These upgraded chocolate nut cups pack all the joy of your go-to store treats but cut way back on sugar while boosting the nutrition factor. Using top-notch dark chocolate with protein-packed nut butter makes a snack that tackles serious chocolate needs and keeps you full longer. You'll love that perfect mix—the crisp chocolate shell giving way to that silky, nutty middle—creating an amazing blend of textures you can't stop eating.
I first whipped up these chocolate cups when I needed sweet snacks that wouldn't mess with my blood sugar as someone with Type 1 diabetes. What started as a health-smart option quickly turned into the family favorite that everybody picks over the sugary store versions. The deep chocolate paired with smooth nut butter and that little bit of sea salt makes something that's actually more interesting and filling than the too-sweet originals.
Key Components and Shopping Advice
- Dark Chocolate: Go for at least 85% dark for the lowest sugar and fullest taste. The strong chocolate flavor means you won't need much sweetener.
- Cashew Butter: Gives you the silkiest filling with a subtle taste that works great with dark chocolate. Pick a natural one without extra sugars or oils.
- Sea Salt: This little touch makes all the difference! Just a tiny bit brings out both the chocolate and nut flavors while making that awesome sweet-salty combo.
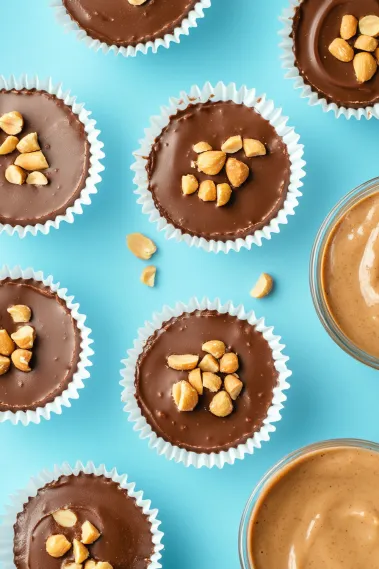
- Chopped Nuts: Adding some crunch to the filling turns these from good to amazing. Try different nuts for new textures and tastes.
Your ingredients really matter in such a simple recipe. When I switched from regular chocolate chips to a fancy dark chocolate bar, the difference was huge – deeper flavor, better feel in your mouth, and a much more satisfying treat overall.
Step-by-Step Making Guide
- Step 1: Get Your Chocolate Ready
- Start by melting about two-thirds of your dark chocolate using either a double boiler or microwave in short 30-second bursts, stirring each time until it's smooth. Take it off the heat and mix in the remaining third of chopped chocolate, stirring until it's all melted and looks glossy. This easy tempering trick helps your chocolate set with a nice snap. Put paper liners in a mini muffin tin and drop about a teaspoon of melted chocolate into each cup, then use your spoon to push it slightly up the sides.
- Step 2: Mix Your Filling
- In a small bowl, mix your cashew butter (or whatever nut butter you like) with a tiny bit of sea salt until smooth. For some texture, mix in finely chopped almonds, pecans, or walnuts. Your filling should be thick enough to stay put but still easy to spoon. If your nut butter seems too runny, chill it for 10-15 minutes before putting the cups together. If you want it sweeter, you can add a little honey or maple syrup, but many folks find the natural sweetness from the nut butter works fine with the dark chocolate.
- Step 3: Put The Cups Together
- After the chocolate bases have firmed up a bit (about 5 minutes in the fridge), add a small spoonful of your nut butter mix to each cup, making sure not to add too much. Leave some room around the edges and top for the final chocolate layer. Gently press down on the filling to flatten it and get rid of air bubbles. If the filling feels too soft, chill for another 5-10 minutes before moving on.
- Step 4: Top With Chocolate
- Spoon your remaining melted chocolate over each cup, making sure to cover all the filling. Check that the chocolate reaches the edges to completely seal in the filling. If your chocolate has started to harden, warm it up slightly before using. For the neatest finish, lightly tap the muffin tin on your counter a few times to help the chocolate settle evenly and remove any air pockets.
- Step 5: Add The Final Touch
- Before the chocolate gets hard, sprinkle each cup with a tiny bit of flaky sea salt for looks and extra flavor. Put the whole muffin tin in the fridge for at least 30 minutes until they're completely set. Once firm, take the cups out of the tin and peel off the paper liners. For the best taste and texture, let them sit at room temperature for about 5 minutes before eating - this brings out all the flavors and softens the chocolate just enough for the perfect bite.
 Pin it
My first try making these taught me something important about not rushing chocolate. I hurried through and put warm filling on barely-set chocolate bases, ending up with a messy mix instead of nice layers. Now I always make sure each layer is properly set before moving on, which gives me perfectly layered cups with clear lines between the chocolate and nut butter.
Ways To Enjoy
These chocolate cups work for so many different situations. For everyday snacking, keep them in the fridge for whenever you need a chocolate fix. For fancy get-togethers, arrange them on a wooden board with some fresh berries and mint leaves for a pretty dessert platter. They also make great homemade gifts - put them in small paper cups inside a cute tin or box, include a little note about how they're lower in sugar, and you've got a personal gift anyone would love.
 Pin it
Fun Twists To Try
After making these so many times, I've come up with several spins that keep things interesting. For a coconut version, add some unsweetened shredded coconut to the nut butter filling and top with a sprinkle of toasted coconut before the chocolate hardens. For a coffee twist, mix a quarter teaspoon of espresso powder into the melted chocolate. My personal favorite adds a tiny bit of cinnamon and cayenne to the filling for a Mexican chocolate-inspired cup with a gentle warmth that makes the chocolate taste even better.
Keeping Fresh and Planning Ahead
These chocolate cups keep really well, so they're perfect for making in batches. Store them in an airtight container in the fridge for up to two weeks, though at my house they rarely last that long! For longer storage, they freeze super well for up to three months - just place them in a freezer-safe container with parchment paper between layers so they don't stick together. When you want to eat them, thaw individual cups in the fridge or at room temperature for about 15 minutes. The texture is actually better after freezing, with the chocolate staying crisp and the filling getting even creamier.
 Pin it
These upgraded chocolate nut cups hit that sweet spot between treating yourself and eating smart. They show that healthier options don't have to skimp on taste or satisfaction – they often taste better by letting quality ingredients shine without tons of sugar hiding their flavor. Whether you eat them as a daily treat, after working out, or as a fancy dessert, these chocolate cups give you that deep chocolate fix while helping you stick to balanced eating habits.
Frequently Asked Questions
- → Can I substitute a different chocolate type here?
- Absolutely, you can use any chocolate you like. Pick dark chocolate for a healthy option (aim for 70% cacao or more). Semi-sweet or milk chocolate works if you're not limiting sugar, and stevia-sweetened chips are great for no-sugar recipes. Just remember, higher cacao means a stronger, more bitter flavor.
- → What nut or seed butters would work here?
- Almost any nut or seed butter will do. Classic peanut butter offers a traditional taste, sunflower seed butter is good for allergen-friendly options, hazelnut butter is reminiscent of chocolate spreads, and macadamia butter adds a lush, creamy texture. Stick to natural, no-sugar-added versions for the best outcomes.
- → Do these need freezer storage all the time?
- Not always. Freezing helps initially for setting them, but after that, you can store them in the fridge in a sealed container for up to two weeks. For a firmer texture or longer storage (about two months), pop them in the freezer and let them sit out for five minutes before eating.
- → Could I add extra flavors or ingredients to the filling?
- Sure thing! Add half a teaspoon of cinnamon for spice, a teaspoon of maple syrup to sweeten, or some collagen powder for a protein boost. A small pinch of cayenne enhances the chocolate. If you like crunch, mix in chia seeds or hemp seeds, but don't add too much liquid as it'll soften the texture.
- → What's the trick for making them sugar-free?
- To make them fully sugar-free, swap in unsweetened chocolate or stevia-based chocolate chips. For unsweetened chocolate, a dash of powdered erythritol or a few drops of stevia will help balance the bitterness. Double-check your nut butter for added sugars and sweeten it with a pinch of monk fruit, if needed.
- → Can I use regular muffin liners if I don't own mini ones?
- Yes, regular muffin tins and liners work fine. With these, you'll get about 4-5 larger cups rather than minis. Use 1 tablespoon of chocolate and about 1-1.5 teaspoons of filling in each one. Freeze them a little longer to make sure they firm up all the way. Bigger cups are great for serious chocolate fans!