
 Pin it
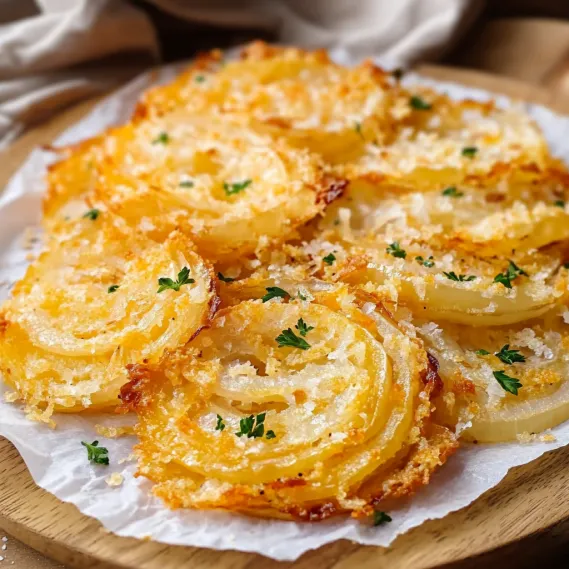
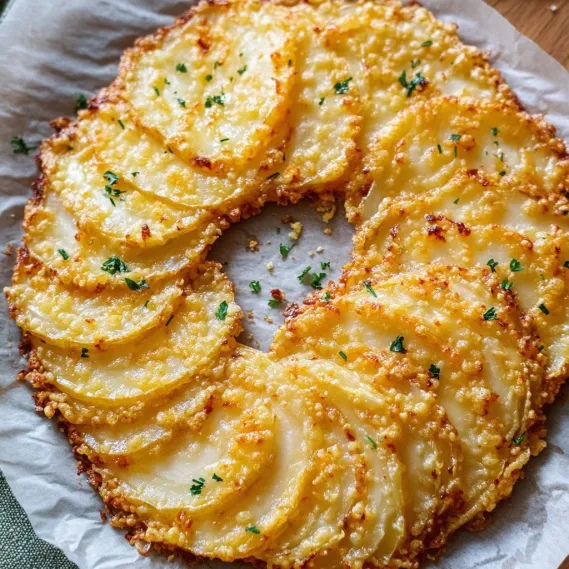
Turn ordinary onions into golden, cheese-coated bites that'll vanish minutes after serving at any get-together. I stumbled on this idea last Christmas when I needed something fast but fancy, and now it's my go-to crowd-pleaser whenever I host.
My buddy next door practically begged me to share this after tasting it at my Christmas bash. I always laugh watching people's shocked faces when they find out they're munching on plain old onions.
- Large onions: Go for sweet ones like Vidalia for tastier results
- All purpose flour: Forms the first layer that helps everything stick
- Salt and pepper: Basic seasonings that bring out the onions' natural sweetness
- Eggs: Work as the glue for your crunchy coating
- Milk: Makes the egg mix just runny enough for good dipping
- Sharp cheddar cheese: Gives that bold taste and stretchy, melty goodness
- Breadcrumbs: The key to getting that amazing crunch
- Parmesan cheese: Adds a nutty kick and helps make that golden outer layer
- Fresh parsley: Adds a pop of color and fresh taste
- Olive oil: Gets you that perfect browning in the oven
- Preheat and Prep:
- Crank your oven to 400°F and line your baking tray with parchment. The paper stops sticking and makes cleanup a breeze. Give the parchment a light olive oil brush for extra protection and flavor. A hot oven from the start means your onions will brown right away.
- Prepare the Dipping Stations:
- Set up a three-bowl assembly line. Bowl one needs flour mixed with salt and pepper. Mix it well so the seasoning spreads evenly. Bowl two should have eggs and milk beaten till smooth. Bowl three gets breadcrumbs mixed with both kinds of cheese. This order really matters for good coating.
- Master the Coating Technique:
- Roll each onion slice first in flour, shake off the extra. Next, dunk it in the egg mix, letting excess drip away. Last, press it firmly into the cheesy breadcrumbs, making sure it's fully covered. Use your left hand for dry stuff and right for wet to keep your fingers from getting gunked up.
- Arrange for Perfect Cooking:
- Put your coated slices on the baking sheet with about an inch between them so air can flow. Sprinkle or spray more olive oil on top for extra crispness and better browning. Don't pack them too close or they'll steam instead of crisp up.
- Bake to Golden Perfection:
- Slide them into your hot oven and cook for 20 to 25 minutes. Check them after 15 minutes to see how they're browning. If some are cooking faster, turn the pan around. You want a deep gold color, crispy outside, and tender inside. The cheese should be melted and slightly browned.
The real trick here is using sharp cheddar. I tried making a batch with mild cheese once and they just weren't the same. That sharp flavor cuts through the sweet caramelized onions and creates that crazy good taste that makes everyone reach for seconds.
Tasty Prep-Ahead Tricks
You can get these onion treats ready and store them in the fridge uncooked for up to 4 hours before your party. Just cook them about 5 minutes longer if they're cold from the fridge. You can also bake them earlier and warm them up in a 350°F oven for 5 minutes right before guests arrive. They won't be quite as crispy but still taste great. If you need longer storage, freeze the uncooked pieces in a single layer then put them in a container. Cook them straight from frozen by adding 7 to 10 extra minutes.
Delicious Food Companions
These cheesy onion bites go well with tons of main dishes but they're especially good next to grilled meat or thick stews. When serving them as appetizers, put something fresh like a citrus fruit salad nearby to balance out the richness. Adding a cool sour cream or ranch dip makes them even harder to resist. Drink-wise, try a light beer or bubbly dry wine to cut through the richness.
 Pin it
Amazing Slicing Strategy
Getting your onion slices the same thickness really matters for even cooking. Try putting your onions in the fridge for 30 minutes before cutting to stop your eyes from watering and to get cleaner slices. Use a super sharp knife or a mandoline set to about 1/4 inch thick. Too thin and they'll burn before cooking inside, too thick and the centers might stay raw. You can pull the rings apart for smaller pieces or keep them whole for bigger, showier crisps.
 Pin it
Frequently Asked Questions
- → How can I keep these onion bites extra crunchy?
Ensure the breading coats each piece evenly. Spread them out on a tray and drizzle with olive oil before baking for a crisp finish.
- → Can I prep these ahead of time?
Absolutely. Slice the onions and mix the breading in advance, but bake them fresh to keep their crunch.
- → What dips go best with these onion bites?
They’re perfect with ranch, garlic mayo, or tangy marinara. Pick your favorite and enjoy!
- → Can I swap out the cheese?
Sure, try a different type like Gruyère or mozzarella. But the cheddar and Parmesan add a signature savory touch.
- → Can I cook these in an air fryer?
You totally can! Use a temperature of 375°F (190°C) and cook small batches for 12-15 minutes. Shake the basket for an even crunch.
- → How do I store leftovers and reheat them?
Keep leftovers in an airtight container in the fridge for up to two days. Use an oven or air fryer to reheat and keep them crispy.