
 Pin it
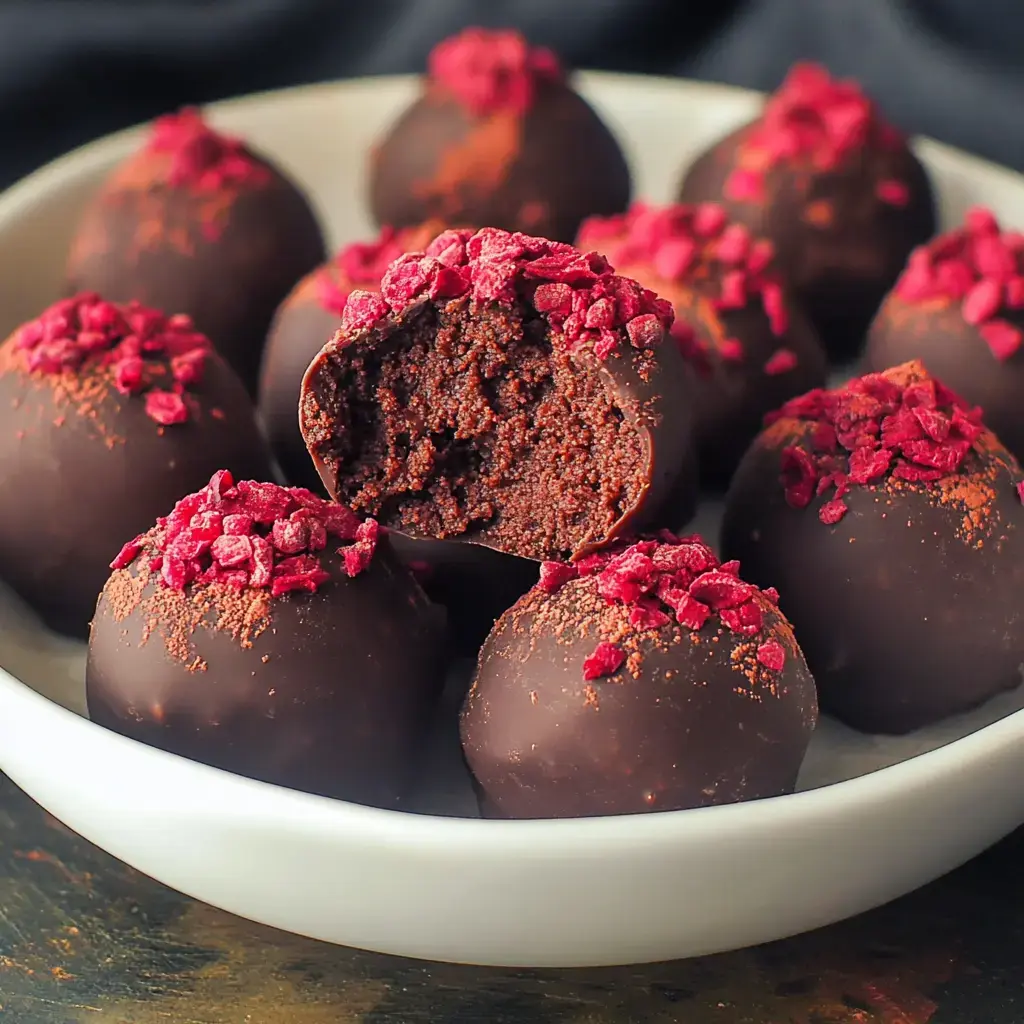
Dark chocolate meets tangy raspberry in these luxurious handmade truffles. Each bite features a velvety center bursting with natural raspberry flavor, wrapped in top-quality dark chocolate and topped with crushed freeze-dried raspberries. We created these treats to bring summer's fresh raspberry goodness to your plate any time of year. They hit the sweet spot between deep chocolate richness and bright fruity notes. Their gorgeous look—dark chocolate with ruby-red hints—makes them perfect for fancy gatherings or thoughtful gifts.
What Makes These Extra Special
These truffles shine because they pack real raspberry punch without any fake stuff. We mix freeze-dried raspberry powder with high-grade dark chocolate for a taste that changes as you eat—starting with zingy raspberry that melts into rich chocolate depths. Our ganache turns out silky-smooth thanks to careful temperature watching and just the right mix of chocolate and cream. Unlike store-bought treats, we use only pure raspberry goodness for truly natural flavor that's both powerful and authentic. The perfect mix of chocolate's slight bitterness with raspberry's brightness creates something complex but wonderfully balanced for folks who really appreciate good chocolate.
Key Ingredients
- Dark Chocolate (400g for centers, 200g for coating): Go for couverture chocolate between 64-72% cacao. Brands like Valrhona Guanaja or Callebaut 811 work best for smooth melting and rich taste. Look for chocolate with 32-36% cocoa butter for proper setting.
- Heavy Cream (240ml): Pick cream with at least 36% fat, and try to avoid ultra-pasteurized versions. You'll need to warm it to just the right temp before mixing.
- Freeze-dried Raspberries (45g for centers, 15g for decoration): Find bright red, crunchy berries with strong flavor. You'll need to crush them differently for various parts of the recipe.
- Unsalted Butter (60g): European-style with minimum 82% fat, softened to 65°F (18°C) before adding.
- Extra Flavor Boosters:
- Framboise liqueur (15ml) to amp up the raspberry taste
- Natural raspberry extract (2-3 drops)
- Cocoa powder (50g) for different coating options
- Edible gold or bronze powder for fancy decoration
- Fresh raspberry dust for topping
- Tools You'll Need:
- Digital thermometer that reads to 0.1°F
- Three different sizes of fine-mesh strainers
- Marble slab or stainless steel work surface
- Scale that measures to 0.1g
- Silicone molds (if you want)
Detailed Crafting Instructions
- Getting Raspberries Ready (45 minutes)
- Split your freeze-dried raspberries into three batches: super-fine powder for mixing into ganache (25g), medium-ground for extra flavor inside (15g), and roughly crushed pieces for decoration (20g). Run each through different strainers to get the right texture. Keep them in separate airtight containers with moisture-absorbing packets.
- Making The Ganache Base (60 minutes)
- Cut chocolate into tiny 1/4-inch bits for even melting. Warm your cream to exactly 94°F (34.4°C). Add it to the chocolate in five small batches, stirring from the middle outward with a silicone spatula. Keep the mix between 92-94°F (33.3-34.4°C) using a water bath. When it's all smooth, the temperature should be 89°F (31.7°C) before you add butter.
- Mixing Everything Together (30 minutes)
- Once your ganache cools to 85°F (29.4°C), mix in raspberry powder in four steps. Start with a small amount (15%), then add 25%, then 35%, then the last 25%. Check how thick it is after each addition – it should coat the back of a spoon evenly with a bit of resistance. Add the optional Framboise at 82°F (27.8°C) if you want.
- First Cooling Period (4-8 hours)
- Pour into a frame or shallow pan lined with acetate. Make sure the surface is completely flat – check with a level. Cover with plastic wrap that touches the whole surface. Cool in the fridge at 38°F (3.3°C) until firm enough that you can cut a clean 1/4-inch slice.
- Shaping The Centers (90 minutes)
- Portion ganache using a scale (12g each) or #60 scoop. Roll quickly into rough shapes, then chill 15 minutes at 36°F (2.2°C). For final rolling, use nitrile gloves that have been chilled so your hands don't warm the chocolate. Each ball should be perfectly round and 2.5cm across.
- Chocolate Coating Process (2 hours)
- Temper your coating chocolate carefully: heat to 120°F (48.9°C), cool to 81°F (27.2°C), then work with it at 88-90°F (31.1-32.2°C). Keep track of the coating temp with an infrared thermometer. Dip centers when they're at 40°F (4.4°C) for the best shell. Sprinkle raspberry powder on top right away before the chocolate hardens.
Troubleshooting Tips
Getting the temperature right is super important throughout the whole process. Watch your room conditions too: keep the room between 68-72°F (20-22°C) with 45-50% humidity. If things go wrong, act fast: when ganache separates, warm it to 92°F (33.3°C) while whisking quickly; if your centers get crystals on them, lightly brush with warmed neutral alcohol before coating. For even coating thickness, keep your chocolate at the exact working temp and dip each center for 3-5 seconds. Break open a sample to check shell thickness – it should be 1.2-1.5mm. Watch for warning signs: shiny patches mean poorly tempered chocolate; rough surfaces usually mean moisture got in; uneven coating happens when temperatures aren't steady.
 Pin it
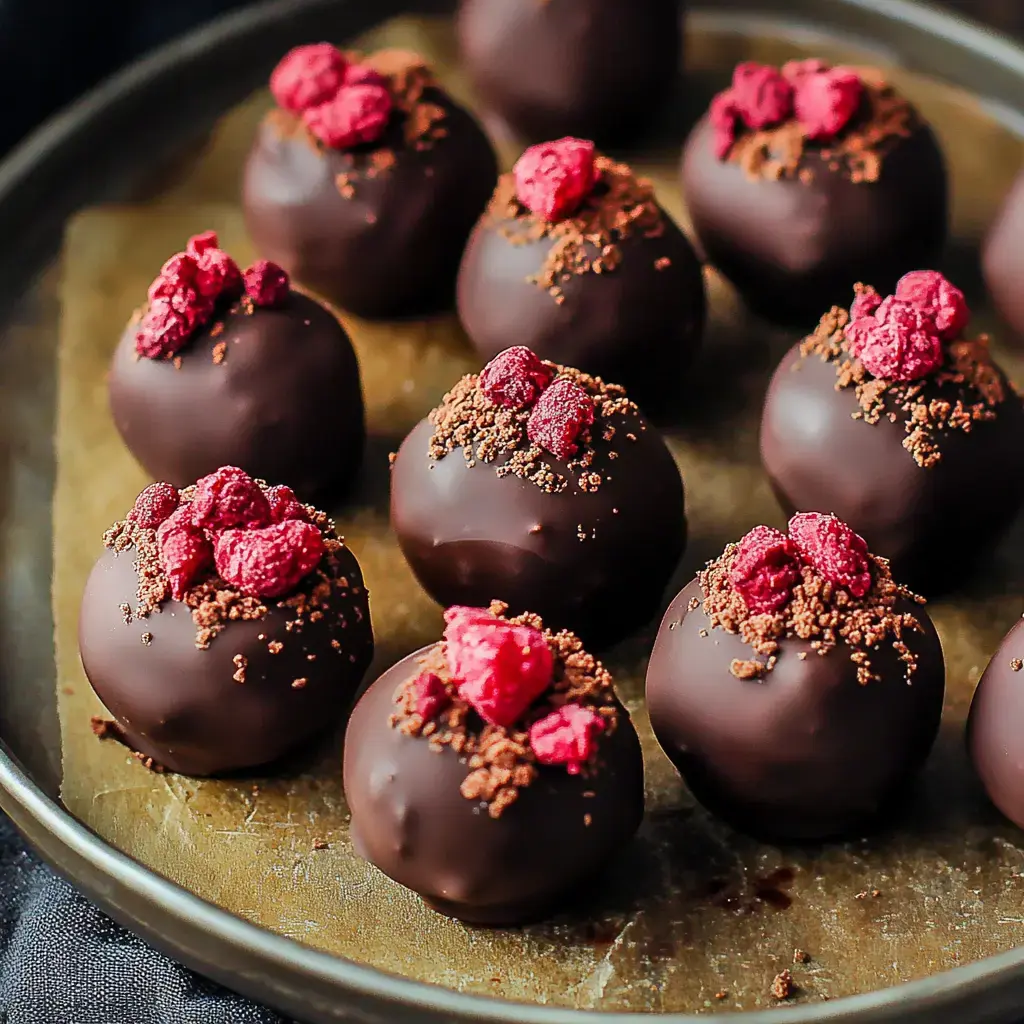
Elegant Serving Ideas
Show off your finished truffles in ways that highlight their handcrafted quality. For gift giving, put them in round fluted cups sized 5-6, preferably deep burgundy or metallic bronze colors. Place in sturdy boxes with food-safe tissue arranged in diagonal patterns. Mix up the finishes for visual interest: some with shiny coating, some dusted with cocoa, and others topped with raspberry powder. For fancy serving, group them in odd numbers on marble or glass plates. Add some fresh raspberries, chocolate decorations, and pulled sugar pieces for height. Don't forget about temperature: take them out of the fridge 22-25 minutes before serving. They taste best at 65-68°F (18-20°C). They go wonderfully with vintage port, aged Banyuls wine, or raspberry-infused dark spirits.
Freshness and Storage Guidelines
Follow these storage rules to keep your truffles tasting amazing. They actually taste best after sitting for 24-48 hours when flavors have settled. Store in airtight containers with humidity control packets at 55-60°F (12.8-15.6°C) for longest shelf life. Put sheets of glassine paper between layers and don't stack more than two layers high. How long they'll stay fresh depends on the coating: shiny tempered ones last 21 days, cocoa-dusted ones about 14 days, and powder-topped ones around 10 days. For longer storage, you can freeze the uncoated centers: wrap each one in wax paper, then vacuum seal in small batches. Freeze at 0°F (-18°C) for up to 4 months. When ready to use, thaw in the fridge for 12 hours, then let sit at room temperature for 2 hours before coating. Use older batches first and check quality every 72 hours if you're making them commercially.
Frequently Asked Questions
- → Why soften dates first?
- Letting dates sit in hot water softens them up, making blending super easy and smooth with the rest of the mix.
- → Can I prepare these early?
- You sure can! Keep them in the fridge for up to 5 days or store uncoated ones in the freezer for a month. Coat them with chocolate after thawing.
- → Why serve these at room temp?
- The centers get softer and taste way better when they’re not cold. Take them out 30 minutes before sharing.
- → What’s the deal with two forks?
- Using two forks lets extra chocolate drip off, so the coating looks smooth. Scrape the forks along the edge of the bowl for cleaner work.
- → Can I swap in fresh raspberries?
- Nope, only freeze-dried ones work because they’re dry and won’t mess with the chocolate layer.