
 Pin it
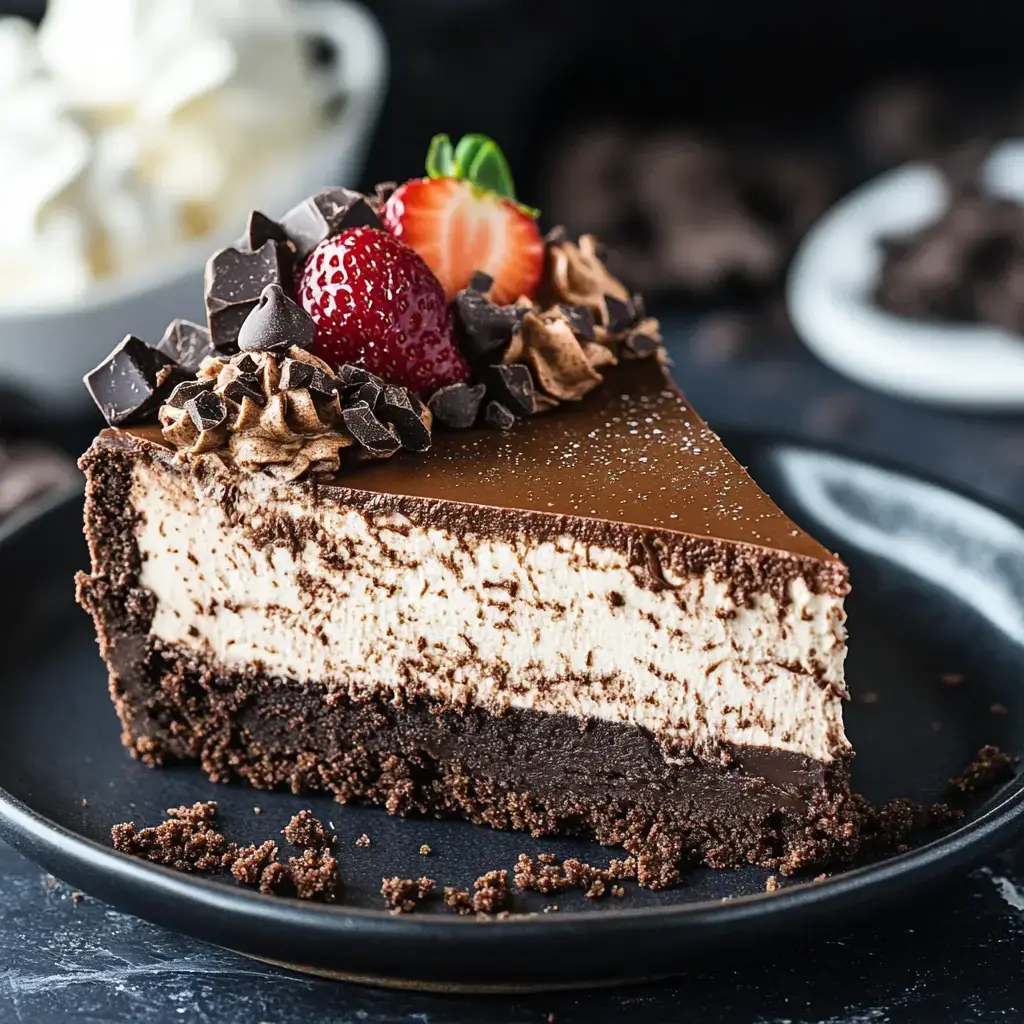
- Gotta share my top pick chocolate cheesecake formula! I've tweaked this countless times and now it's just right - a super creamy treat that'll wow everyone. The base is a buttery chocolate cookie layer with the creamiest chocolate filling you'll ever try. Add some whipped cream or toss on fresh berries and watch folks smile with their first taste!
What Makes This Work So Well
- This dessert is honestly foolproof! You'll get that velvety texture every single time and the chocolate taste is incredibly rich. Never made one before? No sweat - I'll guide you step by step. And you can finish it however you want, making it great for any party!
Grab These Items
- Cookie Bits: Go with chocolate ones for the tastiest base.
- Cream Cheese: Don't skimp on fat content here!
- Sweetener: Plain sugar works best with chocolate.
- Two Types of Chocolate: Both cocoa and melted chocolate chips.
- Hidden Helper: A bit of coffee brings out chocolate flavor.
- Thick Cream: Creates that smooth mouthfeel.
- Eggs: Not cold from fridge for better blending.
- Real Vanilla: Brings everything nicely together.
Baking Time
- Making Your Base
- Mix those cookie bits with melted butter until it looks like damp sand. Push the mix down hard into your springform, using a measuring cup bottom to flatten it nicely. Stick it in a 350°F oven for just 7 minutes to set it up. Let it cool all the way while you handle the filling - a solid base means better slices later.
- Working on The Filling
- Start with cream cheese that's not cold - this really matters for smoothness. Beat it for about 3-4 minutes at medium, scraping sides often until there's no lumps at all. Slowly put in sugar and cocoa, mixing until it's all combined. Add your melted chocolate and coffee, beating until it looks shiny and even. Then drop in eggs one by one on low speed, just until they disappear. Don't mix too much or you'll get cracks.
- Smart Baking Steps
- Pour your mix into the crust slowly so you don't trap air. Bake at 325°F for the first half hour to set the edges. Then drop to 250°F and bake another 45 minutes. The middle should still jiggle slightly. Turn the oven off but keep the cake inside with the door shut another half hour - this stops cracks from forming.
- Cooling Takes Time
- After sitting in the turned-off oven, open the door just a bit and let it sit one more hour. Then cool it to room temp before putting in the fridge at least 2 hours, but overnight works even better. This slow cooling is why you'll get that amazing texture.
- Finishing Touches
- Use a warm knife around the edge before opening the springform. For clean cuts, dip your knife in hot water and wipe between slices. Top with fresh whipped cream, some chocolate curls, or fresh berries. Serve cool but not super cold - let it sit out about 15 minutes for the best taste.
Get It Right Every Time
- All stuff should be room temperature or you'll end up with bumpy batter.
- Don't beat too much after adding eggs or it'll crack later.
- Letting it cool gradually in the oven isn't optional - it's key for texture.
- Tap your bowl against the counter before baking to get air bubbles out.
 Pin it
Try These Twists
- Looking fancy? Drizzle warm chocolate sauce on top.
- Big on berries? Swirl some raspberry through it.
- Try using Oreos for the base instead.
- Feeling bold? Add a tiny bit of cinnamon or chili for an interesting kick!
Storage Tips
- It'll stay good in your fridge for 5 days if nobody finishes it first!
- Need to save some? Cover it well and freeze for up to a month.
- My best advice? Make it a day early - it tastes even better the next day.
Frequently Asked Questions
- → Why keep ingredients warm?
Keeps the mixture smooth and free of clumps.
- → Why bake at different heats?
Avoids cracks and ensures it cooks evenly.
- → What’s the deal with air bubbles?
Popping them prevents cracks on the surface.
- → What’s cooling gradually for?
Stops the top from cracking and sinking.
- → Can I store it frozen?
Yes, just wrap it tightly and keep for 3 months max.
- → Why add parchment paper?
Makes it easier to remove and stops sticking.
- → How about no espresso?
You can swap it for strong coffee or skip altogether.