
 Pin it
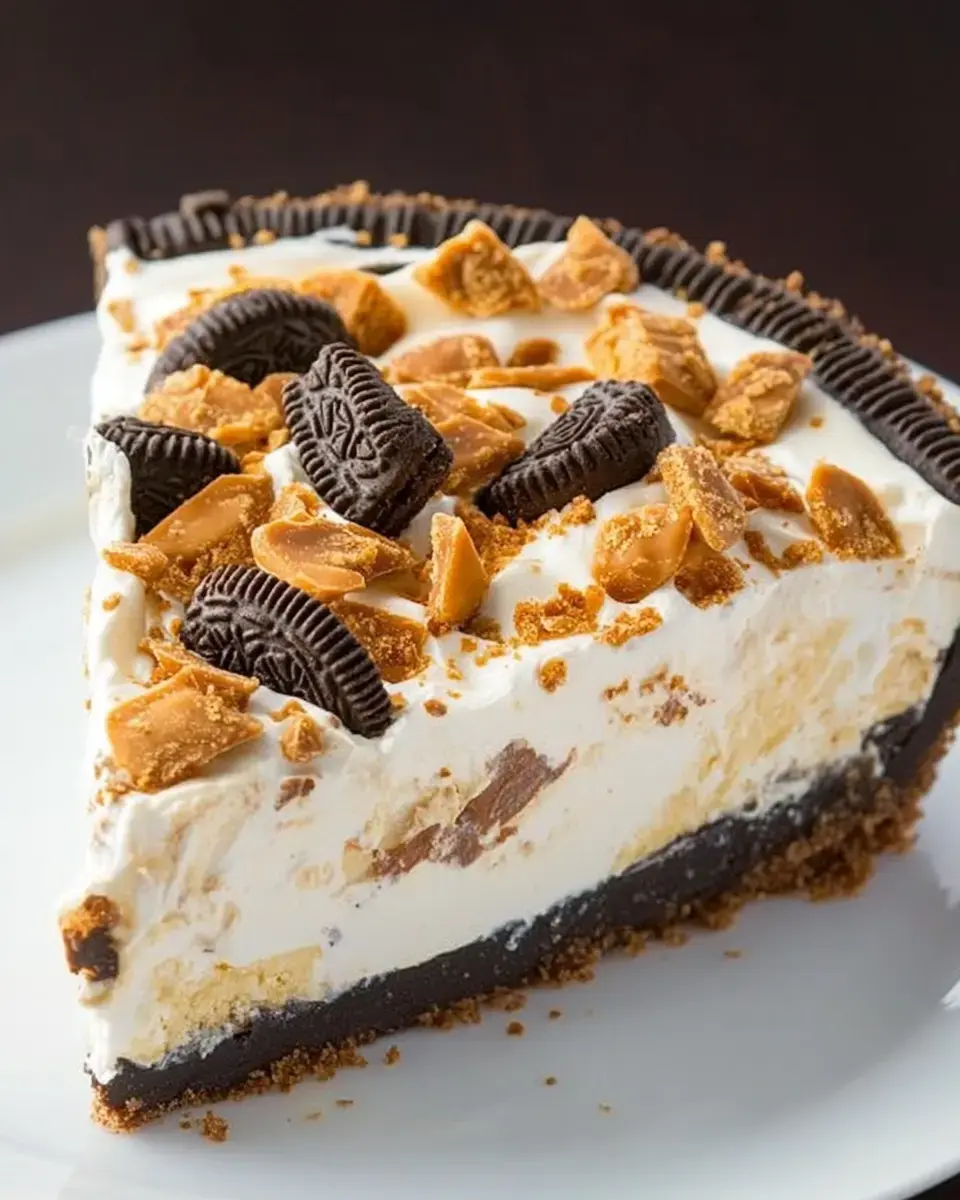
Say hello to your go-to sweet treat: Butterfinger Pie. This super easy, no-bake delight blends the amazing taste of crushed Butterfinger candy with a smooth, velvety filling all tucked inside a decadent Oreo cookie base. It's fantastic for any get-together and so straightforward you'll want to make it again and again. The mix of smooth and crunchy textures will have everyone asking for seconds.
What Makes Butterfinger Pie Absolutely Delightful
This Butterfinger Pie will win over anyone who loves the mix of chocolate and peanut butter. Every forkful gives you fluffy cream, bits of crunchy Butterfinger, and that dark, rich Oreo foundation. The best part? You won't need to heat up your kitchen since there's no baking involved. It's super fast to put together but looks like you spent hours on it. You can easily change it up with different toppings or mix-ins too—your friends and family will be so impressed.
What You'll Need for Butterfinger Pie
- Oreo Cookies: Smashed up finely to create that dark, chocolatey base.
- Butter: Melted down to bind your crust ingredients together.
- Heavy Whipping Cream: Beaten until it forms firm peaks for that cloud-like texture.
- Vanilla Extract: Gives a warm, sweet undertone to your whipped cream.
- Powdered Sugar: Makes your whipped topping just sweet enough.
- Cold Milk: Blends with the pudding mix for that creamy middle layer.
- Instant Vanilla Pudding: Forms the smooth, thick center of your pie.
- Butterfinger Bits: Brings that signature crunch and peanut butter flavor throughout. Buy them pre-crushed or smash your own bars.
Putting Together Your Oreo Base
- Get Your Crust Ready
- Turn those Oreos into tiny crumbs using your food processor or pop them in a bag and smash with a rolling pin. Mix the crumbs with your melted butter until everything's wet. Push this mixture into a 9-inch pie dish, making sure it's packed down evenly. Put it aside for now.
Whipping Up The Center
- Beat Your Cream
- Grab your mixer and whip that heavy cream with some vanilla until it stands up in stiff peaks. Split this whipped cream into two different bowls—you'll use one part for inside the pie and one for the top.
- Add Sweetness
- Mix the powdered sugar into one bowl of whipped cream. This will be your topping, so keep it separate.
- Mix Your Pudding
- In another bowl, stir cold milk into your vanilla pudding powder until it thickens up nicely. Gently fold in the plain whipped cream until everything looks uniform. Toss in most of your Butterfinger pieces, but save some to sprinkle on top later.
 Pin it
Putting It All Together and Chilling
- Build Your Pie
- Dump your pudding mixture onto the Oreo crust and smooth it out flat. Add your sweetened whipped cream on top, either spreading it around or making fancy swirls with a piping bag. Sprinkle those leftover Butterfinger bits all over the top.
- Chill Time
- Wrap the whole thing in plastic and stick it in the freezer for at least 6 hours, but 12 is even better. This waiting period lets everything firm up so you can cut nice, clean slices.
How to Enjoy and Keep Your Butterfinger Pie Fresh
When you're ready to dig in, take the pie out of the freezer and let it sit on the counter for about half an hour so it softens up a bit. Cut it into slices and dig in! If you don't finish it all, just cover what's left with plastic wrap or pop it in a sealed container and back in the freezer it goes—it'll stay good for up to a month. This pie is perfect to make ahead when you know you'll be busy but still want something awesome for dessert.
Frequently Asked Questions
- → How long can it stay frozen?
- If wrapped properly, this pie can last up to 2 months in the freezer. Ensure it's tightly covered with plastic wrap and foil to avoid freezer burn.
- → Can other candy bars work?
- Definitely! Swap Butterfingers for Snickers, Heath, or Reese's cups. Just chop them small before mixing into the filling.
- → Why wait before eating?
- Letting it sit for 20-30 minutes helps it soften up, making it easier to slice and giving it that ideal creamy texture for serving.
- → Is store-bought cream okay?
- Sure, you can use pre-made whipped cream, but homemade gives the pie a better texture. Just know store-bought might make it less fluffy.
- → What can I use instead of a pie plate?
- If you don’t have a deep pie dish, a springform pan works great. Any extra filling can be served as a separate treat.